
How to Troubleshoot iPhone 14 Blurry Photos and Videos
Realizing the photos and videos you capture on your iPhone 14 are coming out consistently blurry, pixelated, or lacking sharpness can certainly be frustrating. You likely want reliably crisp, high-quality shots. But don’t delete those fuzzy pictures yet—blurriness is often caused by easily correctable mistakes or camera setting adjustments.

With some informed troubleshooting, you can determine what factors are negatively impacting your iPhone 14 camera’s image quality and make corrections for tack-sharp photos and videos. This guide will cover the most common causes of blurry shots and actionable solutions to test on your device. Just a few simple techniques can drastically improve your photo and video sharpness.
Common Causes of Blurry Photos/Videos
Some typical reasons your iPhone 14 produces blurry images and footage include:
- Unsteady hands – Even slight natural handshakes become blurry without optical image stabilization. Enable QuickTake for stabilization.
- Moving subjects – Fast-moving subjects can easily blur if the shutter speed isn’t fast enough. Tap to set focus on subjects.
- Low light conditions – Poor lighting requires slower shutter speed that can create blur. Use Night mode.
- Lens smudges – Dust, fingerprints, or debris on the lens prevents sharp focus. Clean the lens gently with a microfiber cloth.
- Digital zooming – Digital zoom decreases resolution and sharpness, unlike optical zoom. Move physically closer instead of pinching to zoom.
- Focus issues – Out-of-focus shots always turn out soft and fuzzy. Check that auto-focus is enabled and tap to focus.
Troubleshooting For Sharper Photos
If your iPhone 14 photos and videos appear consistently blurry, try these troubleshooting techniques. This can help clear out any misconfigured and/or erratic settings that are ruining the quality of your iPhone’s camera output.
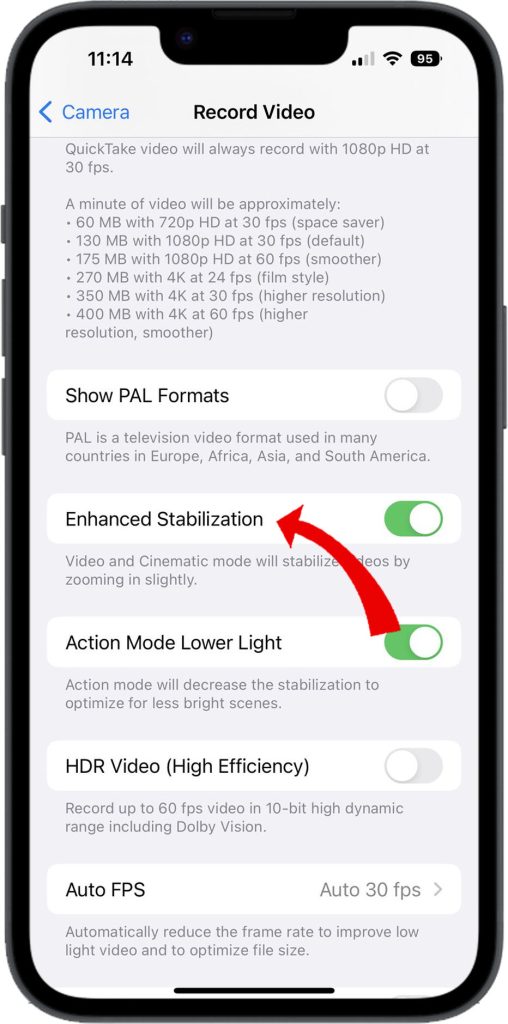
Step 1: Enable QuickTake Video Stabilization
When you open the camera app on your device, you can use the QuickTake stabilization mode to minimize the effect of shaky hand movements while capturing photos or recording videos. To activate this mode, simply press and hold the shutter button.
Here are the steps on how to enable QuickTake video stabilization on your iPhone 14:
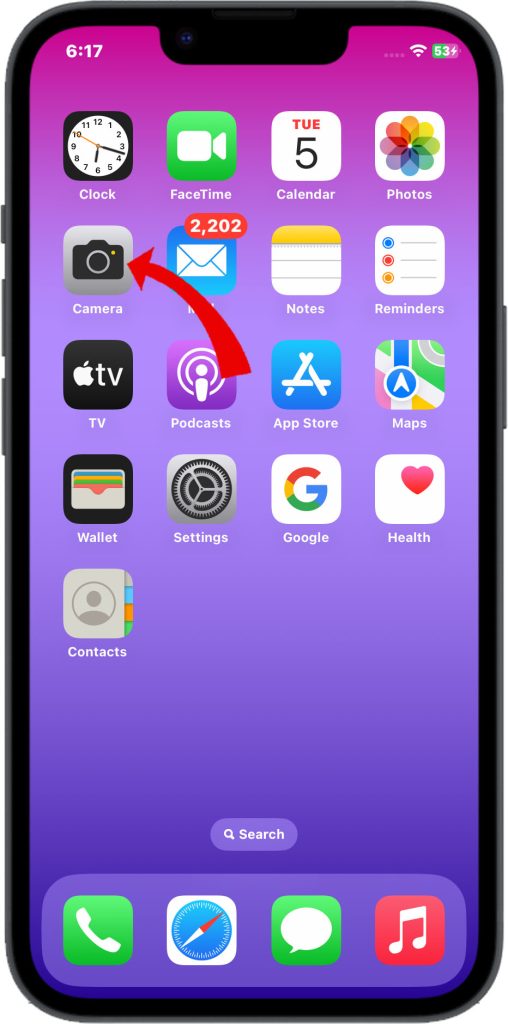
- Open the Camera app.
- Tap and hold the Record button.
- The QuickTake video stabilization icon will appear in the top left corner of the screen.
- If the icon is green, then QuickTake video stabilization is enabled.
- If the icon is gray, then QuickTake video stabilization is disabled.
You can also enable or disable QuickTake video stabilization in the Camera settings. To do this, follow these steps:
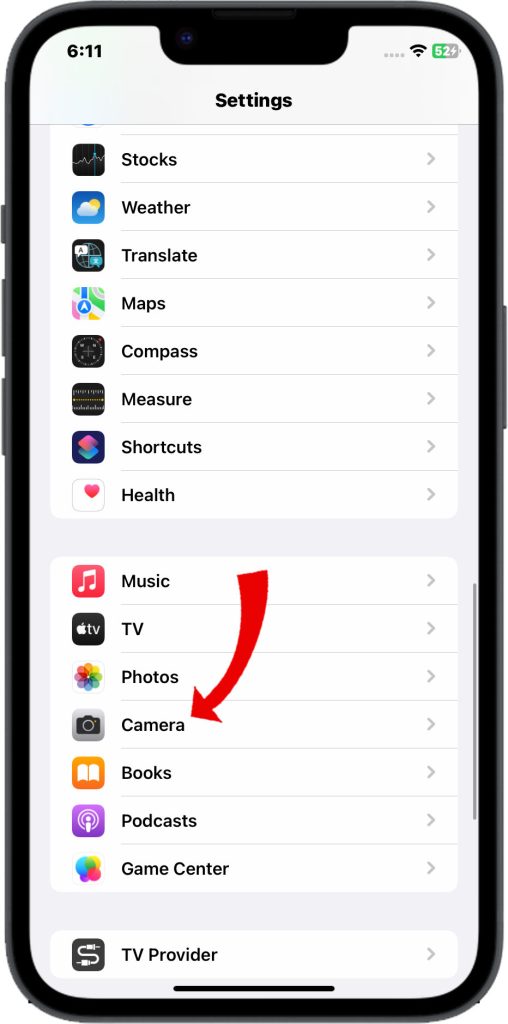
- Open the Settings app.
- Tap on Camera.
- Tap on Stabilization.
- Toggle the QuickTake Video Stabilization switch to enable or disable it.
QuickTake video stabilization helps to reduce shakiness in your videos. It is especially useful when you are recording videos while walking or moving around.

This will lock the camera into the QuickTake stabilization mode, allowing you to capture clearer and more stable images without the need for a tripod or other stabilizing equipment.
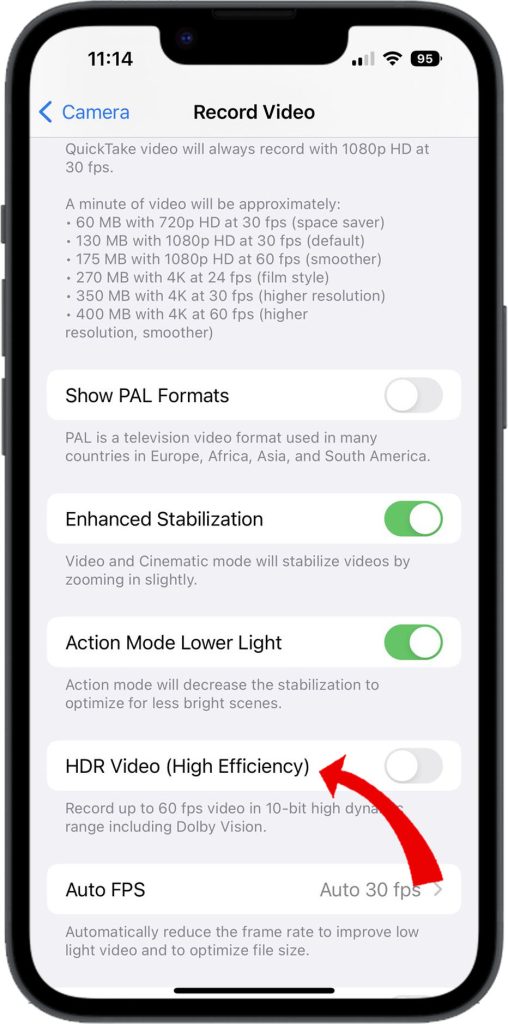
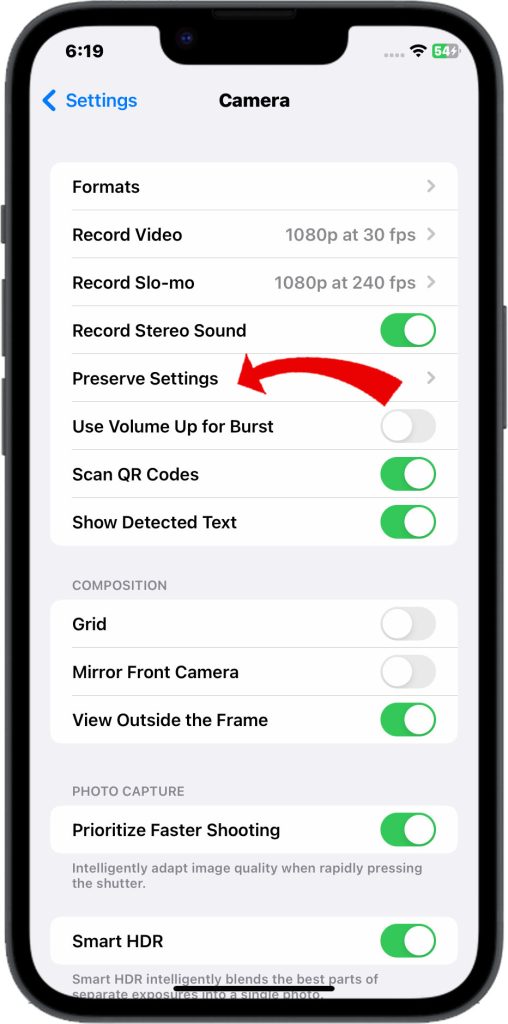
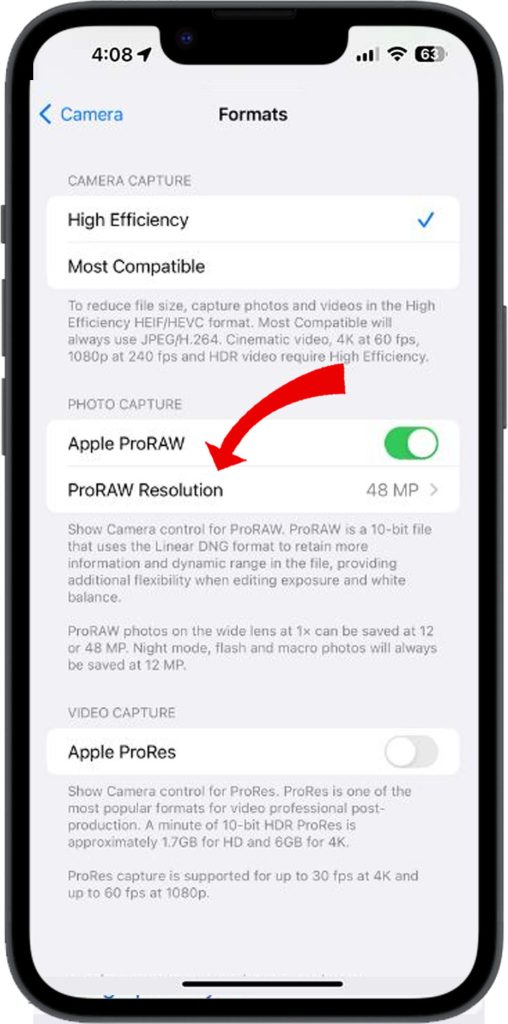
Step 2: Adjust Camera Settings
Auto HDR and Smart HDR are features that can help improve the clarity and contrast of lighting in challenging conditions.
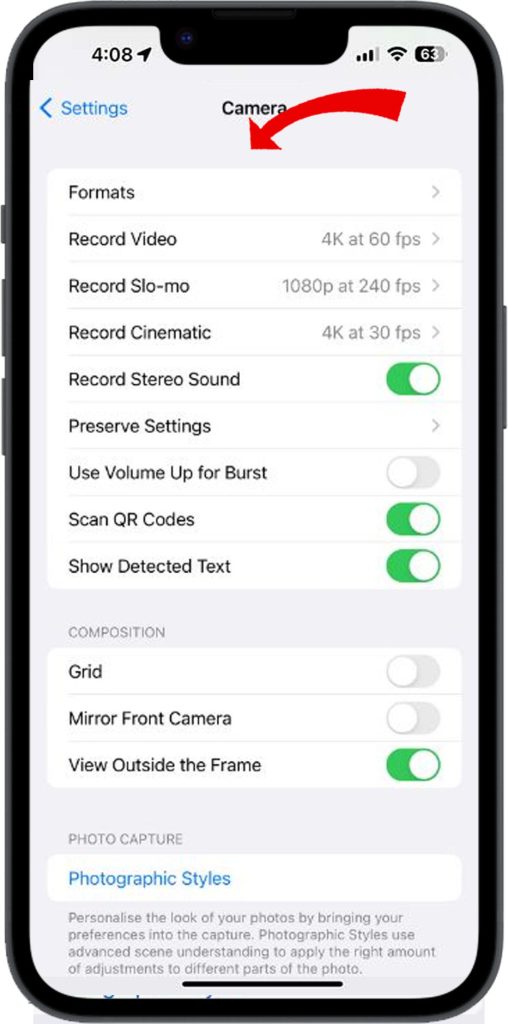
Here are the steps on how to adjust iPhone 14 camera Auto HDR and Smart HDR settings:
- Open the Camera app.
- Tap on the Settings icon (the gear icon) in the top left corner of the screen.
- Tap on HDR.
You will see two options:
- Auto HDR: This is the default setting, and it will automatically enable HDR when it is needed.
- Smart HDR: This setting uses machine learning to intelligently adjust HDR for each photo.
You can also adjust the following settings:
- HDR off: This will disable HDR for all photos.
- Highlight priority: This setting will prioritize preserving highlights in photos, even if it means sacrificing shadow detail.
- Shadow priority: This setting will prioritize preserving shadow detail in photos, even if it means sacrificing highlight detail.
These features work by automatically adjusting the exposure of the camera to capture a wider range of light and dark areas in a scene, resulting in more detail and better focus.
So, by enabling these features, you can enhance your camera’s focus ability and capture better-looking photos in various lighting conditions.
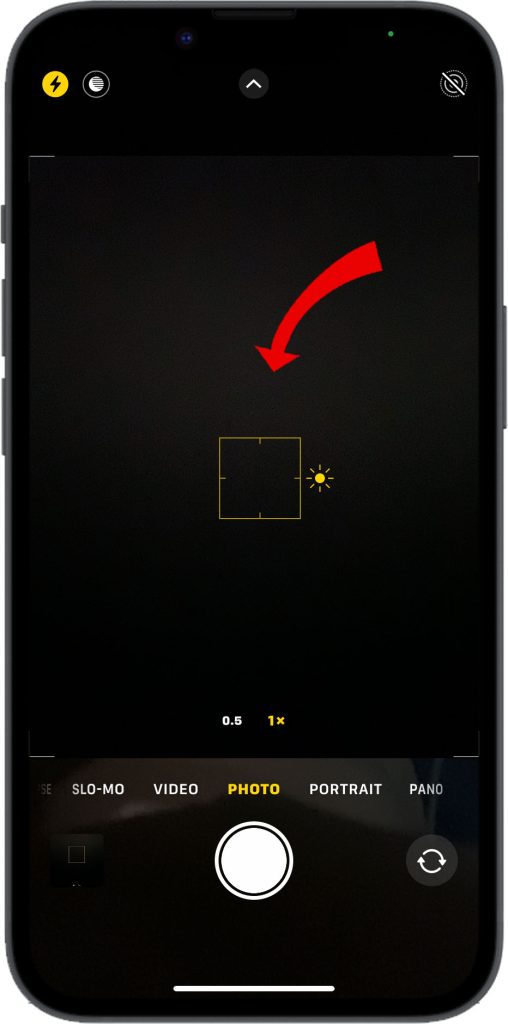
Step 3: Tap to Set Focus
When you’re taking a photo, tapping on your smartphone screen will set the focus on the area you tapped. This is especially important when you’re taking pictures of moving subjects or in low-light conditions.
If you need to lock the focus on the subject, you can hold your finger on the screen until the focus locks.
Tap to set focus is a feature on the iPhone 14 that allows you to manually set the focus of the camera by tapping on the screen. This can be useful when you want to focus on a specific object or area in your photo.
To use tap to set focus, follow these steps:
- Open the Camera app.
- Point the camera at the object or area that you want to focus on.
- Tap on the screen where you want the focus to be.
The camera will automatically focus on the area that you tapped. You can also drag your finger around the screen to adjust the focus. This will ensure that your photos come out clear and focused on the subject you intended to capture.
Tap to set focus is available on all iPhone 14 models. It is a great way to get creative with your photos and make sure that the focus is on the right subject.
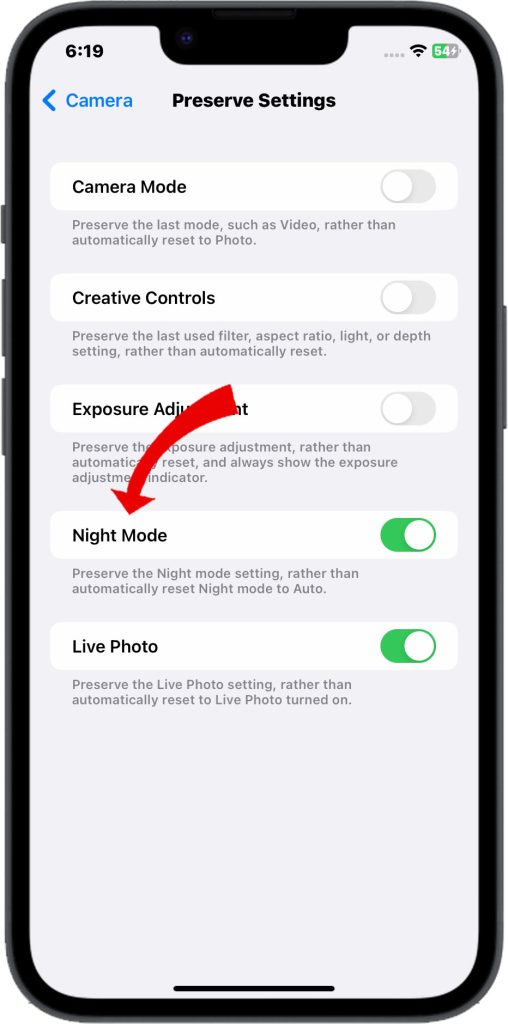
Step 4: Leverage Night Mode
Night mode is a feature in cameras that helps capture better-quality photos in low-light conditions. It uses advanced processing techniques to compensate for the lack of light and motion blur that can occur in low-light settings.
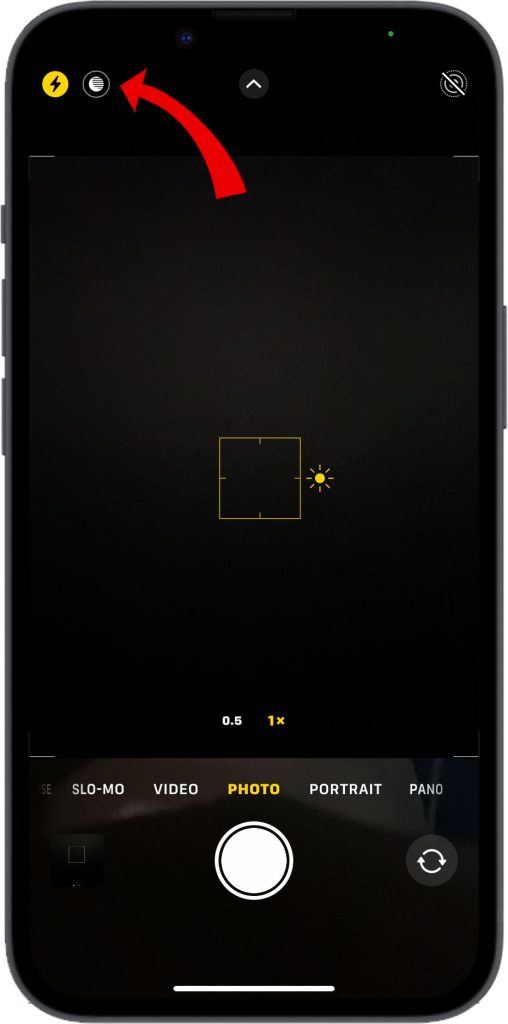
Here’s how to leverage Night mode on iPhone 14 camera:
- Open the Camera app.
- Point the camera at the subject that you want to take a photo of.
- If the scene is dark, the Night mode icon will appear in the top left corner of the screen.
- Tap on the Night mode icon to enable it.
- The camera will take a longer exposure to capture more light, which will result in a brighter and clearer photo.
You can also adjust the Night mode settings:
- Exposure: This will adjust the brightness of the photo.
- Highlights: This will adjust the brightness of the highlights in the photo.
- Shadows: This will adjust the brightness of the shadows in the photo.

This results in clearer and brighter photos that would have otherwise been blurry or too dark to see.
Step 5: Avoid Digital Zooming
The optical zoom lenses use the lens elements to adjust the magnification of the image, which maintains the quality of the photo. In contrast, digital zoom uses software to enlarge the image, resulting in a loss of resolution and clarity.
Therefore, to achieve the best photo quality, it is recommended to use only the optical zoom lenses and avoid using the digital zoom function in the viewfinder.
The iPhone 14 has a triple-lens rear camera system with a 12MP wide-angle lens, a 12MP ultrawide-angle lens, and a 12MP telephoto lens. The telephoto lens has a 3x optical zoom, which means that you can zoom in on your subject without losing any quality.
To use the optical zoom lenses on your iPhone 14 camera, follow these steps:
- Open the Camera app.
- Point the camera at the subject that you want to take a photo of.
- Tap on the Telephoto lens icon in the bottom right corner of the screen.
You can then zoom in and out by dragging your finger up or down on the screen.
Step 6: Steady Phone with Tripod
When taking photos or videos, shaky hands can often lead to blurry shots.
- To avoid this, use a portable tripod or find a steady, flat surface to place your camera on.
This will help stabilize your camera and reduce the chance of motion blur. By doing this, you can capture clear and sharp images or videos that you will be proud to share with others.
Step 7: Clean Rear Camera Lens
The rear camera lens of your device is an essential component that captures the images or videos you take. Over time, dust, oils, or debris can accumulate on the lens, which can result in blurry or distorted images.
- To prevent this, it is recommended that you gently clean the rear camera lens using a soft cloth or a lens cleaning kit.
This will ensure that your camera lens stays free from any dirt or debris and that your images or videos remain sharp and clear.
With practice and tweaking settings for your shooting conditions, your iPhone 14 is capable of capturing incredibly sharp, print-worthy photos and smooth videos. Just remember to hold still!