If your iPhone 11 is freezing and lagging, it can be very frustrating. There are a few things you can try to fix the problem, but it can be difficult to know where to start.
In this article, we’ll walk you through the most common solutions for fixing an iPhone 11 that keeps freezing and lagging. We’ll also cover some additional tips that may help you troubleshoot the issue.
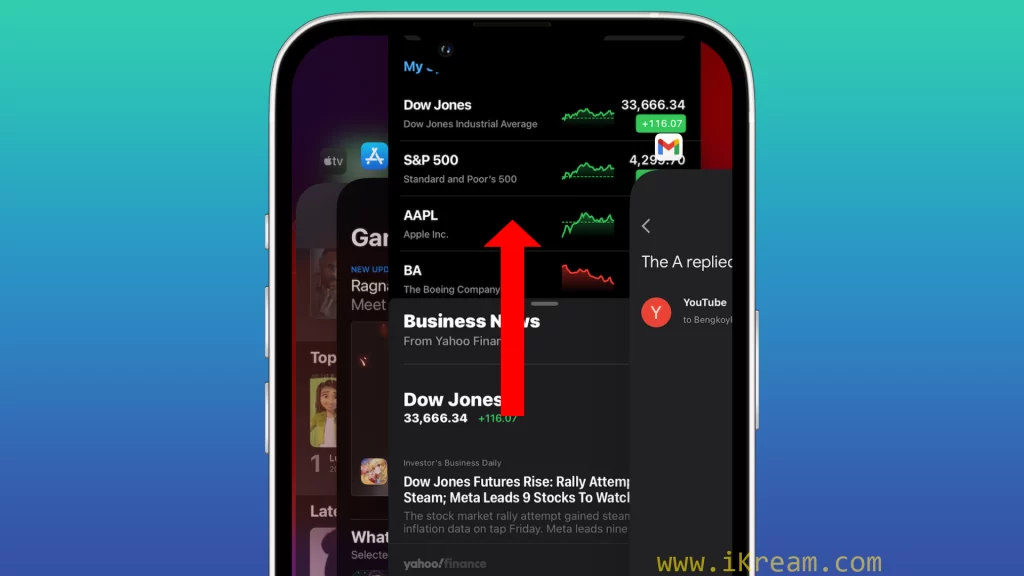
Whether you’re a new iPhone user or a seasoned pro, this article is for you. So, if you’re having trouble with freezing and lagging on your iPhone 11, keep reading – we’ll help you get it fixed in no time.
iPhone 11 Keeps Freezing
Is your iPhone 11 frequently freezing and experiencing lag? Dealing with a sluggish device can be incredibly frustrating, hindering your productivity and overall user experience. However, before you consider replacing or repairing your iPhone 11, there are several common causes of freezing and lag that you can address on your own. In this article, we will delve into the reasons behind your iPhone 11 freezing and provide practical solutions to help you resolve the issue and restore smooth performance.
If your iPhone 11 keeps freezing, it could be due to various factors, including software glitches, insufficient storage, or problematic apps. This article aims to guide you through the troubleshooting process to identify and address the root cause of the freezing issue. From performing a basic restart and updating your device’s software to clearing storage space and troubleshooting problematic apps, we will explore each potential solution in detail. By following these step-by-step instructions, you can regain control of your iPhone 11 and eliminate frustrating freezes and lags, optimizing its performance and ensuring a smoother user experience.
Contents
Possible Causes
The common causes of freezing and lagging on iPhone 11 are:
- Software glitches: Minor software glitches can sometimes cause freezing and lagging. A restart or software update can often fix these glitches.
- Outdated iOS version: An outdated version of iOS may contain bugs that can cause freezing and lagging. Make sure to keep your iPhone 11 up to date with the latest version of iOS.
- Too many open apps: Having too many apps open at the same time can consume resources and slow down your iPhone. Close any apps that you are not using.
- Unused apps: Unused apps can take up storage space and slow down your iPhone. Delete any apps that you do not use regularly.
- Full storage: A full iPhone can also cause freezing and lagging. Delete any unnecessary files and apps to free up storage space.
- Hardware issues: In some cases, freezing and lagging can be caused by a hardware issue with the iPhone 11. If you have tried all of the above troubleshooting steps and the freezing and lagging is still persisting, it is possible that there is a hardware issue with your iPhone 11. In this case, you may need to have your iPhone repaired by a certified Apple technician.
Force restart your iPhone
You have to force restart your iPhone because it can fix minor software glitches that may be causing the freezing and lagging. A force restart clears the iPhone’s RAM and resets its operating system, which can often resolve performance issues.
Here is how to force restart your iPhone 11:
- Press and quickly release the volume up button.
- Press and quickly release the volume down button.
- Press and hold the side button until you see the Apple logo.
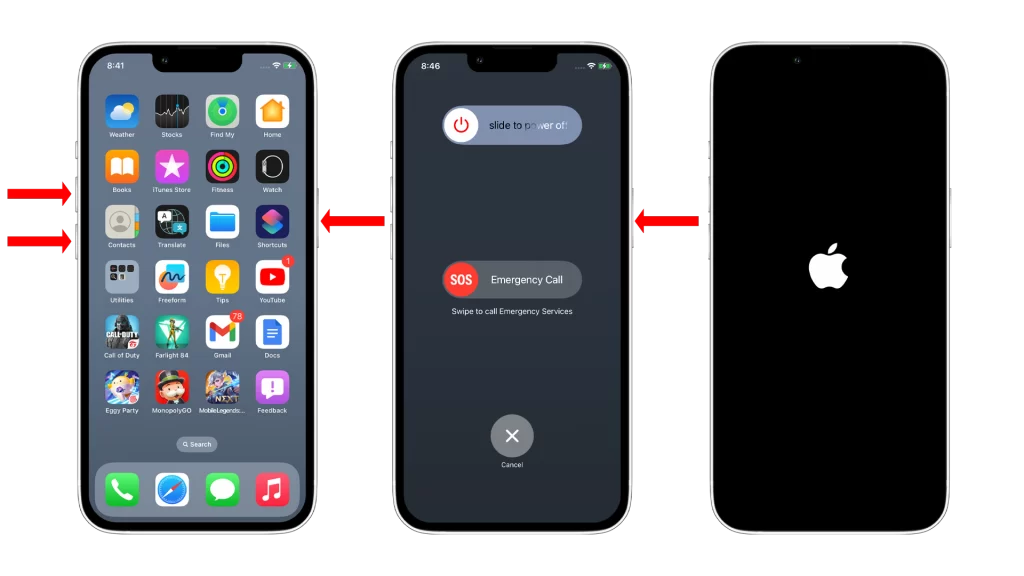
Once you see the Apple logo, release the side button. Your iPhone will restart and should be working properly again.
Check for updates
You should check for updates to your iPhone 11 because Apple often releases updates that fix bugs and improve performance. This includes fixing bugs that may be causing your iPhone to freeze and lag.
To check for updates on your iPhone 11, go to Settings > General > Software Update. If there is an update available, you will see a prompt to download and install it.
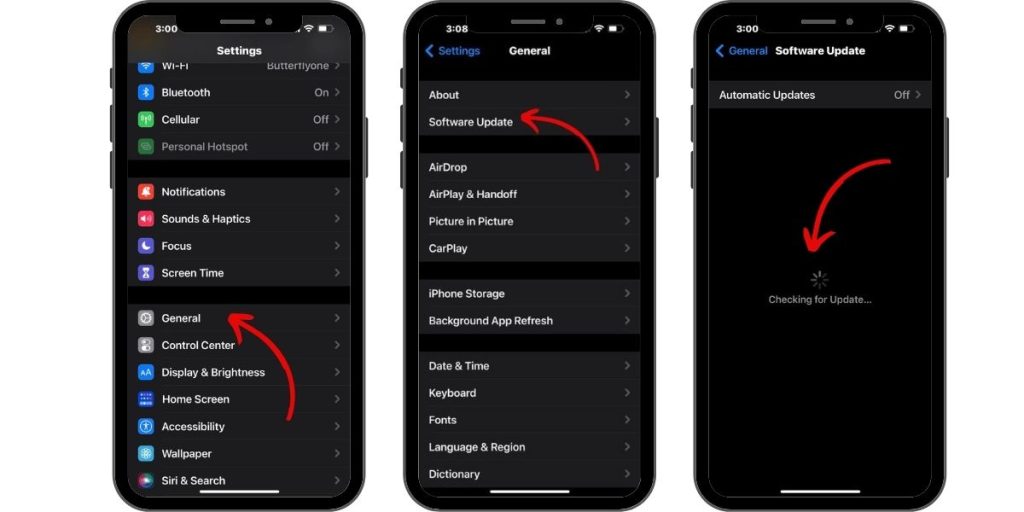
Here are some of the benefits of updating your iPhone 11:
- Fixes bugs and improves performance
- Adds new features and improvements
- Improves security
If you are experiencing freezing and lagging on your iPhone 11, it is a good idea to check for updates and install any that are available. This may fix the problem.
Close all open apps
You have to close all open apps because when you have too many apps open at the same time, it can consume resources and slow down your iPhone. This can lead to freezing and lagging.
Closing all open apps can help to free up resources and improve the performance of your iPhone. It can also help to prevent apps from freezing or crashing.
To close all open apps, swipe up from the bottom of the screen and pause in the middle. Then, swipe up on each app preview to close it.
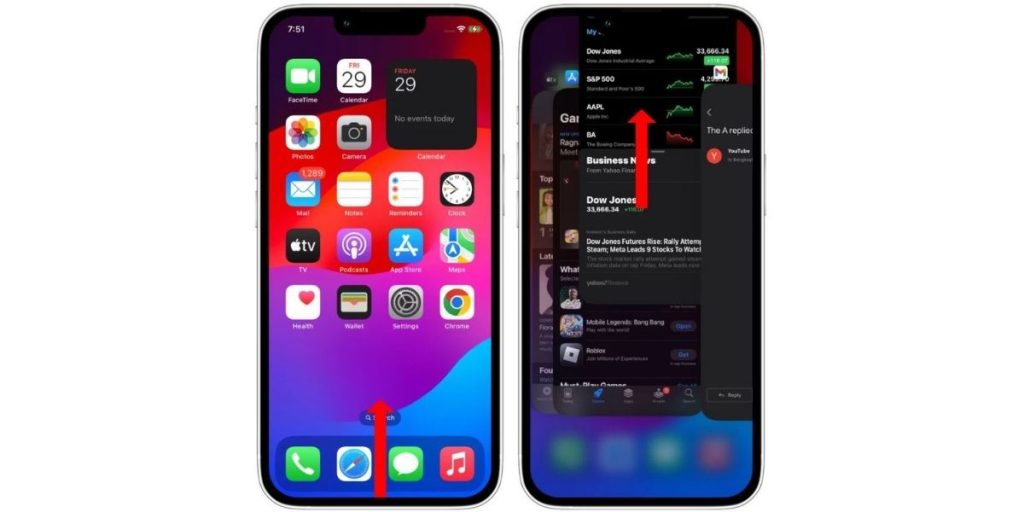
Here are some tips for closing all open apps:
- Close apps that you are not using.
- Force quit apps that are frozen or unresponsive.
- Delete unused apps.
- Keep your iPhone’s software up to date.
Delete unused apps
You have to delete unused apps because they can take up storage space and slow down your iPhone. When you have too many apps installed on your iPhone, it has to work harder to manage all of them. This can lead to freezing and lagging.
To delete unused apps, press and hold on any app icon until the options show. Then, tap the Remove App and select Delete App to confirm.
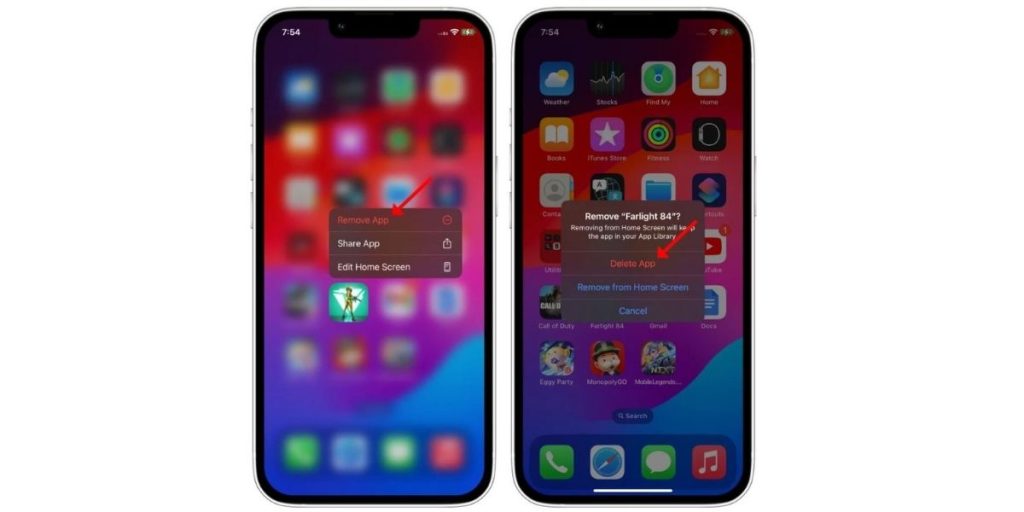
Here are some additional benefits of deleting unused apps:
- Improved performance: By deleting unused apps, you can free up resources and improve the performance of your iPhone.
- Increased battery life: Unused apps can continue to run in the background, even when you’re not using them. This can drain your battery. By deleting unused apps, you can extend your battery life.
- More storage space: Unused apps can take up a lot of storage space. By deleting unused apps, you can free up storage space for other things, such as photos, videos, and music.
If you’re not sure which apps to delete, you can try the following:
- Delete any apps that you haven’t used in a while.
- Delete any apps that you don’t use very often.
- Delete any apps that you can live without.
You can also use the “Offload Unused Apps” feature to offload unused apps to iCloud. This will free up storage space on your iPhone without deleting the apps completely. To offload unused apps, go to Settings > General > iPhone Storage. Then, tap Offload Unused Apps.
If you need an app that you’ve offloaded, you can download it again from the App Store.
Reset all settings
You may need to reset all settings if none of the other troubleshooting steps have fixed the freezing and lagging issue on your iPhone 11. Resetting all settings will restore all of your iPhone’s settings to their factory defaults. This will erase all of your custom settings, such as your Wi-Fi passwords, Bluetooth pairings, and app preferences. However, it will not erase any of your personal data, such as your photos, videos, or documents.
Resetting all settings can be a helpful way to fix freezing and lagging issues because it can clear out any corrupted or conflicting settings that may be causing the problem. It can also be helpful if you are having trouble with a specific app or feature, as it will reset all of the settings for that app or feature.
To reset all settings on your iPhone 11, follow these steps:
- Go to Settings > General > Transfer or Reset iPhone > Reset.
- Tap Reset All Settings.
- Enter your passcode to confirm.
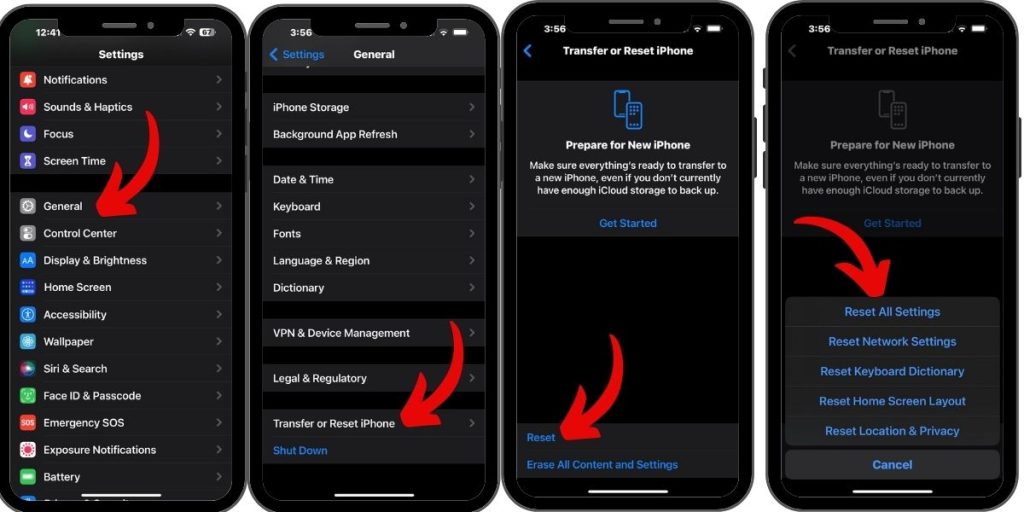
Your iPhone will restart and all of its settings will be restored to their factory defaults.
Important: Before you reset all settings, be sure to back up your iPhone. This way, you can restore your data if you need to.
Contact Apple Support
You need to contact Apple Support if you have tried all of the troubleshooting steps above and your iPhone 11 is still freezing and lagging. There is a possibility that there is a hardware issue with your iPhone 11 that needs to be repaired by a certified Apple technician.
Here are some of the things that Apple Support can do to help you fix freezing and lagging on iPhone 11:
- Remote troubleshooting: Apple Support may be able to help you troubleshoot the issue remotely. They may ask you to perform certain tasks on your iPhone 11 or to send them diagnostic information.
- Mail-in repair: If Apple Support is unable to fix the issue remotely, they may send you a prepaid shipping label so that you can mail your iPhone 11 to them for repair.
- In-store repair: If you have an Apple Store nearby, you may be able to take your iPhone 11 in for repair. An Apple technician will diagnose the issue and repair your iPhone 11 if necessary.