
How to Fix “This Accessory May Not Be Supported” Error on iPhone
Getting the “This accessory may not be supported” error when using or charging your iPhone can be frustrating. But don’t worry – in most cases, it’s an easy fix.
This issue typically appears when plugging in an accessory like headphones or charging cables. Here are the top reasons you may see the iPhone “accessory not supported” alert and actionable solutions to get accessories working again.
Fix “This Accessory May Not Be Supported” Error on iPhone
Many smartphone users purchase accessories to enhance their devices. Cases, screen protectors, chargers, headphones, and more allow you to customize and protect your phone. However, some accessories may actually be incompatible with your specific model. Before making any purchases, it’s important to ensure an accessory will work properly with your phone.
Purchasing an incompatible accessory can lead to a frustrating experience. At best, the item simply may not function as intended with your phone. But at worst, using an unsupported accessory could actually damage your device or hinder performance. Do your homework ahead of time to avoid buying accessories that your smartphone does not support.
Ensure Accessory is MFi-Certified
The error often occurs when using non-MFi-certified third-party accessories. MFi means the accessory is made specifically for iPhone/iPad and approved by Apple.
Always use original Apple cables and accessories or verified MFi third-party options. Avoid cheap gas station/dollar store cables, which are rarely certified.
Update to the Latest iOS Version
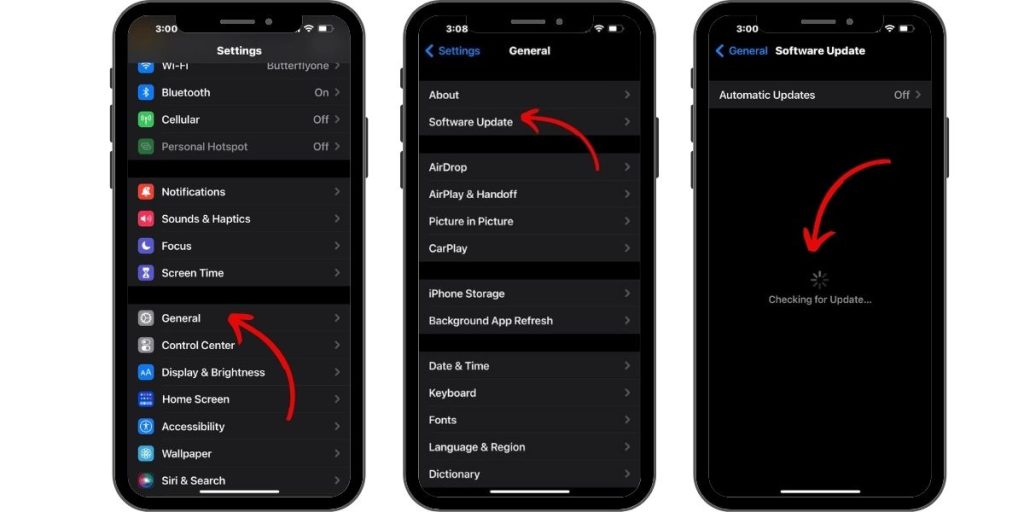
Some accessories require the newest iOS version to function. Go to Settings > General > Software Update and install any available updates. Then, try using the accessory again.
Clean Accessory and Lightning Port
Debris and damage can trigger the alert. Carefully clean the iPhone’s Lightning port and the accessory’s connector with a toothpick, brush, or compressed air. Avoid moisture.
Gently wiggle the cable while inserting it to dislodge particles. This may temporarily fix connection issues.
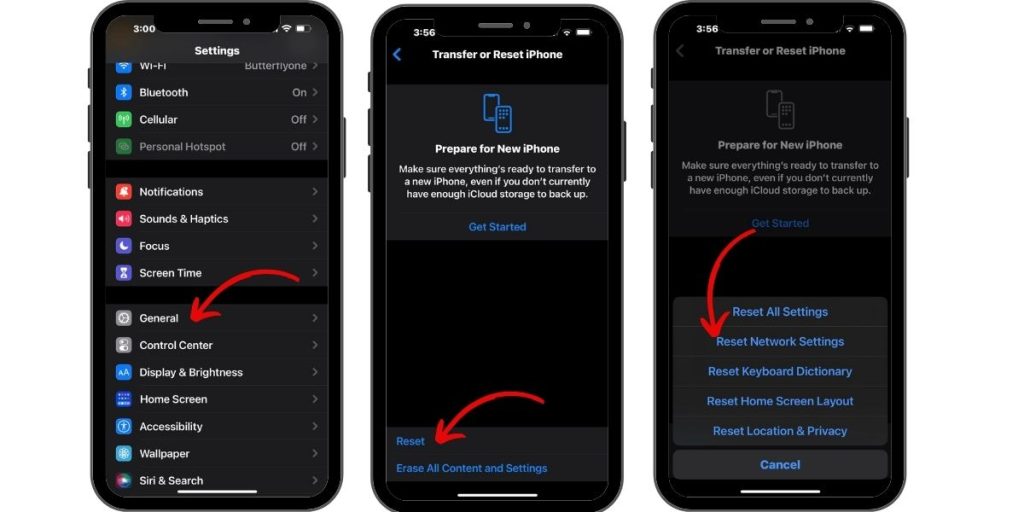
Reset iPhone Network Settings
Go to Settings > General > Reset > Reset Network Settings. This will reset all network-related settings without erasing data. Try the accessory again after resetting the networks.
Contact Apple Support
For persistent “accessory not supported” errors, contact Apple Support for further assistance:
- Book an Apple Store Genius Bar Appointment for in-person support.
- Call Apple support at 1-800-APL-CARE (1-800-275-2273) for phone troubleshooting.
- Initiate a chat or email session with Apple support online.
Apple can run diagnostics, test hardware, and fully troubleshoot any remaining issues with accessories not being supported.
Following the steps above should resolve most cases of accessories not working on iPhones. Start with simpler solutions like using MFi accessories and cleaning debris from ports. Reset network settings if needed. For hardware issues, rely on Apple’s technical support team