
How to Transfer Photos From iPhone To PC Without iTunes
Each of these methods has its own advantages and disadvantages, so it’s important to choose the one that best suits your needs. For example, if you need to transfer a large number of photos quickly, WinX MediaTrans is the best option. If you only need to transfer a small number of photos, you can use email, AirDrop, or Google Photos.
No matter which method you choose, transferring photos from iPhone to PC is a relatively easy process. With a little bit of knowledge, you can have all of your photos safely stored on your PC in no time.
Quick Tip: We recommend WinX MediaTrans as the best iTunes alternative to transfer photos from iPhone to PC quicker and more efficiently.
WinX MediaTrans
WinX MediaTrans is a third-party app that allows you to transfer photos, music, videos, and other files between your iPhone and PC. It’s a fast and easy-to-use app with a simple and straightforward user interface.
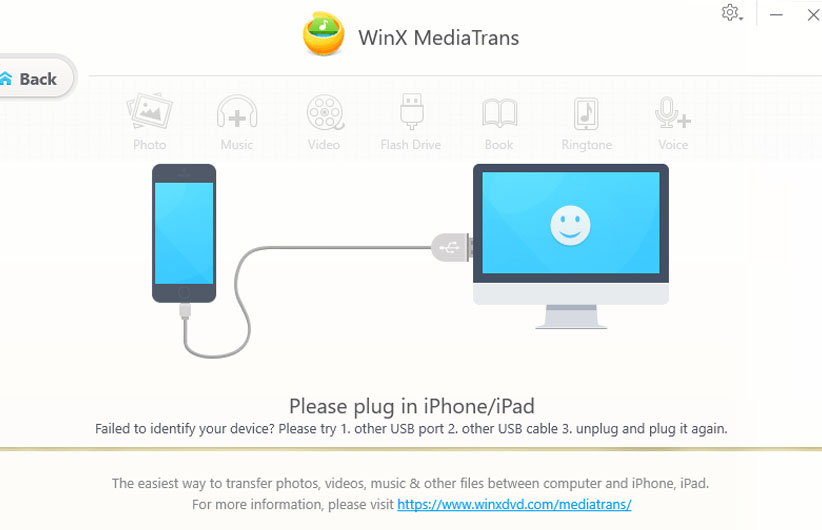
To transfer photos from iPhone to PC using WinX MediaTrans, follow these steps:
- Download and install WinX MediaTrans on your PC.
- Connect your iPhone to your PC using a USB cable.
- Launch WinX MediaTrans.
- Click the “Photo” tab.
- Select the photos you want to transfer.
- Click the “Export” button.
- Choose a destination folder on your PC and click “OK”.
WinX MediaTrans will start transferring the photos to your PC. The transfer time will vary depending on the number of photos you are transferring and the speed of your PC.
Here are some additional tips:
- You can also transfer photos from iPhone to PC by dragging and dropping them from the WinX MediaTrans window to your PC’s desktop or any other folder.
- If you want to transfer all of the photos on your iPhone to your PC, simply click the “Select All” button before clicking the “Export” button.
- You can also use WinX MediaTrans to transfer other types of files from iPhone to PC, such as music, videos, and documents.
You can also transfer photos from iPhone to PC using email. However, this method is only suitable for transferring a small number of photos at a time.
To transfer photos from iPhone to PC using email:
- On your iPhone, open the Photos app.
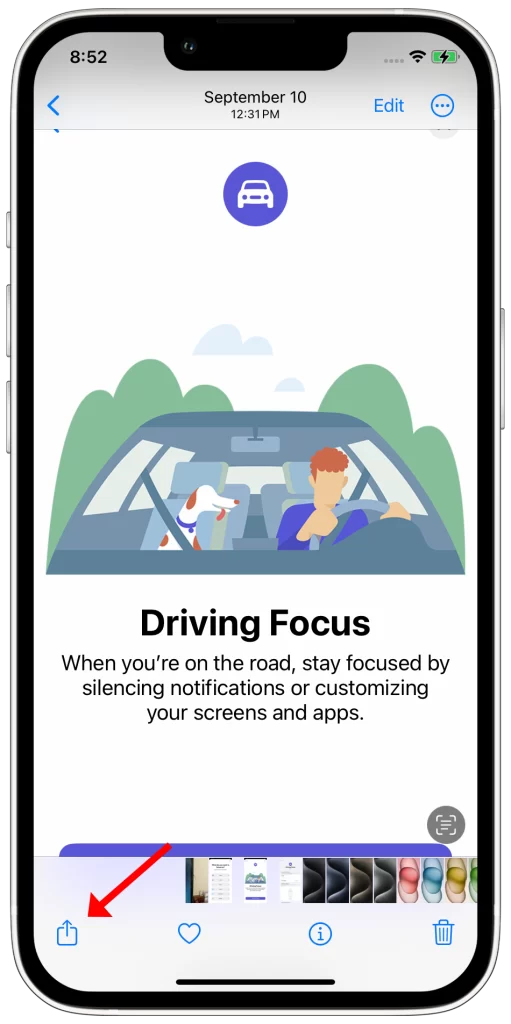
- Select the photos you want to transfer.
- Tap the Share button (the square with an upward arrow).
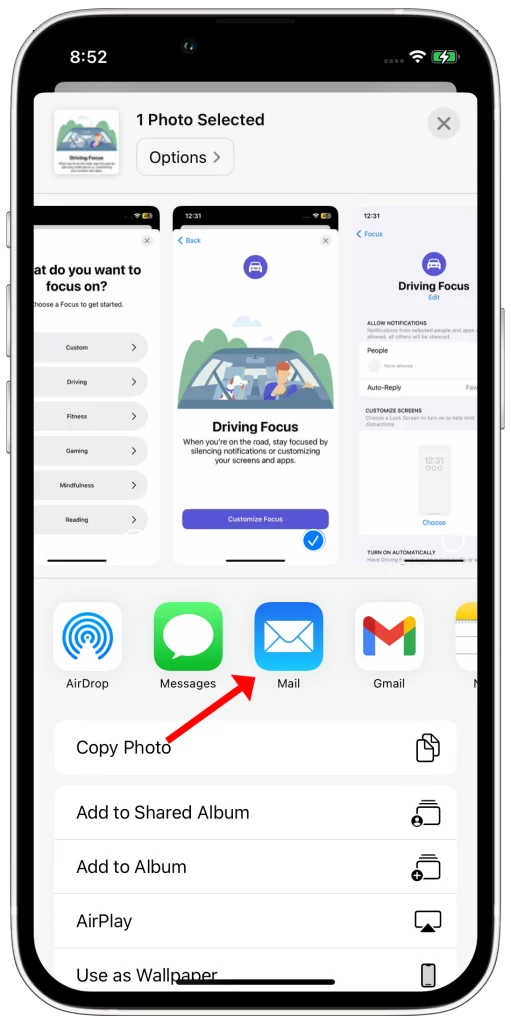
- Tap Mail.
- Compose a new email and attach the photos you want to transfer.
- Send the email to yourself.
- On your PC, open your email inbox and download the photos.
Here are some additional tips:
- You can only transfer up to 5 photos per email. If you need to transfer more photos, you will need to send multiple emails.
- If the photos are too large to be attached to an email, you can compress them using a photo editing app.
- You can also use a cloud storage service such as iCloud or Google Photos to transfer photos from iPhone to PC.
Apple iCloud Photo Library
If you have iCloud Photo Library enabled on your iPhone, you can transfer photos to your PC by downloading them from iCloud.com.
To transfer photos from iPhone to PC using Apple iCloud Photo Library, follow these steps:
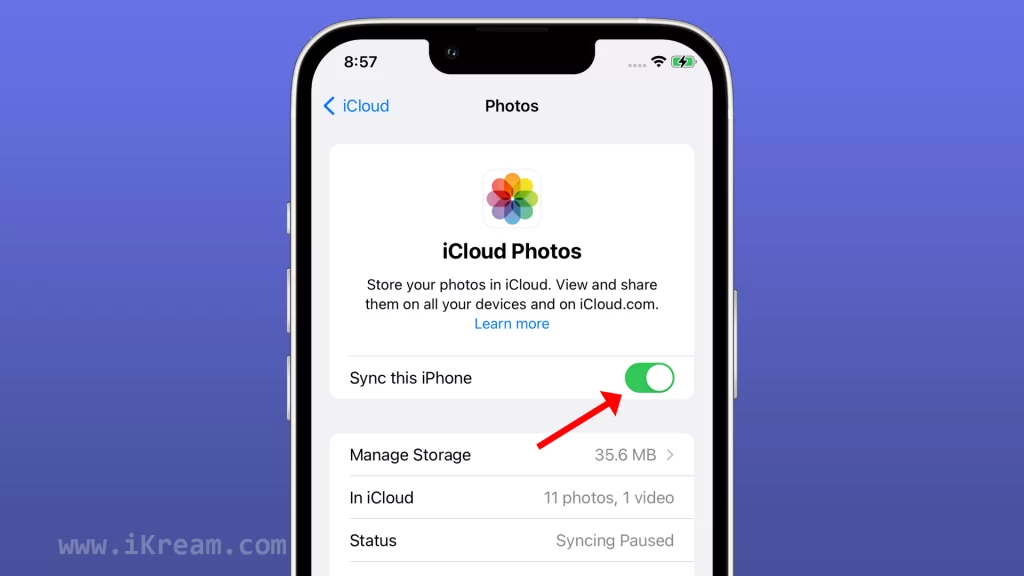
- On your iPhone, go to Settings > Your Name > iCloud > Photos. Make sure that iCloud Photos is turned on.
- On your PC, open a web browser and go to icloud.com. Sign in with your Apple ID.
- Click the Photos icon.
- Select the photos you want to download.
- Click the Download button.
- Choose a location on your PC to save the photos.
- Click Save.
Your photos will be downloaded to your PC as a ZIP file. You can then unzip the file and access the photos.
Here are some additional tips:
- If you have a lot of photos to transfer, you may want to download them in batches.
- You can also download all of your photos at once by clicking the Select All checkbox before clicking the Download button.
- If you have a slow internet connection, you may want to download your photos over a wired connection.
AirDrop
AirDrop is a wireless file transfer feature that allows you to transfer files between Apple devices.
To transfer photos from iPhone to PC using AirDrop, follow these steps:
- Make sure that both your iPhone and PC are connected to the same Wi-Fi network.
- On your iPhone, open the Photos app and select the photos you want to transfer.
- Tap the Share button in the bottom left corner of the screen.
- In the list of sharing options, tap AirDrop.
- Your PC should appear as a destination in the AirDrop list. Tap on your PC’s name to transfer the photos.
Once you have tapped on your PC’s name, the photos will start transferring. You will see a progress bar on your iPhone screen. Once the transfer is complete, you will see a confirmation message.
Here are some additional tips for using AirDrop:
- AirDrop works best when your iPhone and PC are close to each other.
- If you are having trouble connecting to AirDrop, try restarting your iPhone and PC.
- You can also try turning off and turning back on AirDrop on both devices.
Google Photos
Google Photos is a cloud storage service that allows you to back up and store your photos and videos.
To transfer photos from iPhone to PC using Google Photos, follow these steps:
- On your iPhone, download the Google Photos app from the App Store.
- Open the Google Photos app and sign in to your Google account.
- Tap the three lines in the top left corner of the screen.
- Tap “Settings”.
- Tap “Back up & sync”.
- Make sure that “Back up & sync” is turned on.
- Choose how you want to back up your photos and videos. You can choose to back up over Wi-Fi only or over Wi-Fi and cellular data.
- Tap “Back up now”.
Once your photos are backed up to Google Photos, you can access them on your PC by visiting the Google Photos website.
To download photos from Google Photos on your PC, follow these steps:
- Go to the Google Photos website.
- Sign in to your Google account.
- Select the photos you want to download.
- Click the three dots in the top right corner of the screen.
- Click “Download”.
The photos will be downloaded to your PC as a ZIP file. You can then unzip the file and access the photos.
Here are some additional tips for transferring photos from iPhone to PC using Google Photos:
- Make sure that your iPhone has enough storage space to back up your photos and videos.
- If you are backing up your photos and videos over cellular data, it is recommended to connect to a strong Wi-Fi network to avoid overage charges.
- You can also download the Google Photos app on your PC to access your photos and videos offline.
- To automatically download your photos and videos from Google Photos to your PC, you can use the Google Photos Backup and Sync desktop app.
Which method you choose to transfer photos from iPhone to PC will depend on your individual needs and preferences. If you need to transfer a large number of photos, WinX MediaTrans is the fastest and most convenient option. If you only need to transfer a small number of photos, you can use email, AirDrop, or Google Photos.