Sending voice messages on iPhone 13 is easy and convenient. Instead of typing out long text messages, you can quickly record and send audio messages using the Messages app.
Voice messages allow you to convey tone and emotion much better than plain text. You can also send longer, more detailed messages without having to type everything out.
In this guide, we’ll cover how to record, listen to, and manage voice messages on iPhone 13.
How to send voice message on iPhone 13
Enable iMessage on Your iPhone
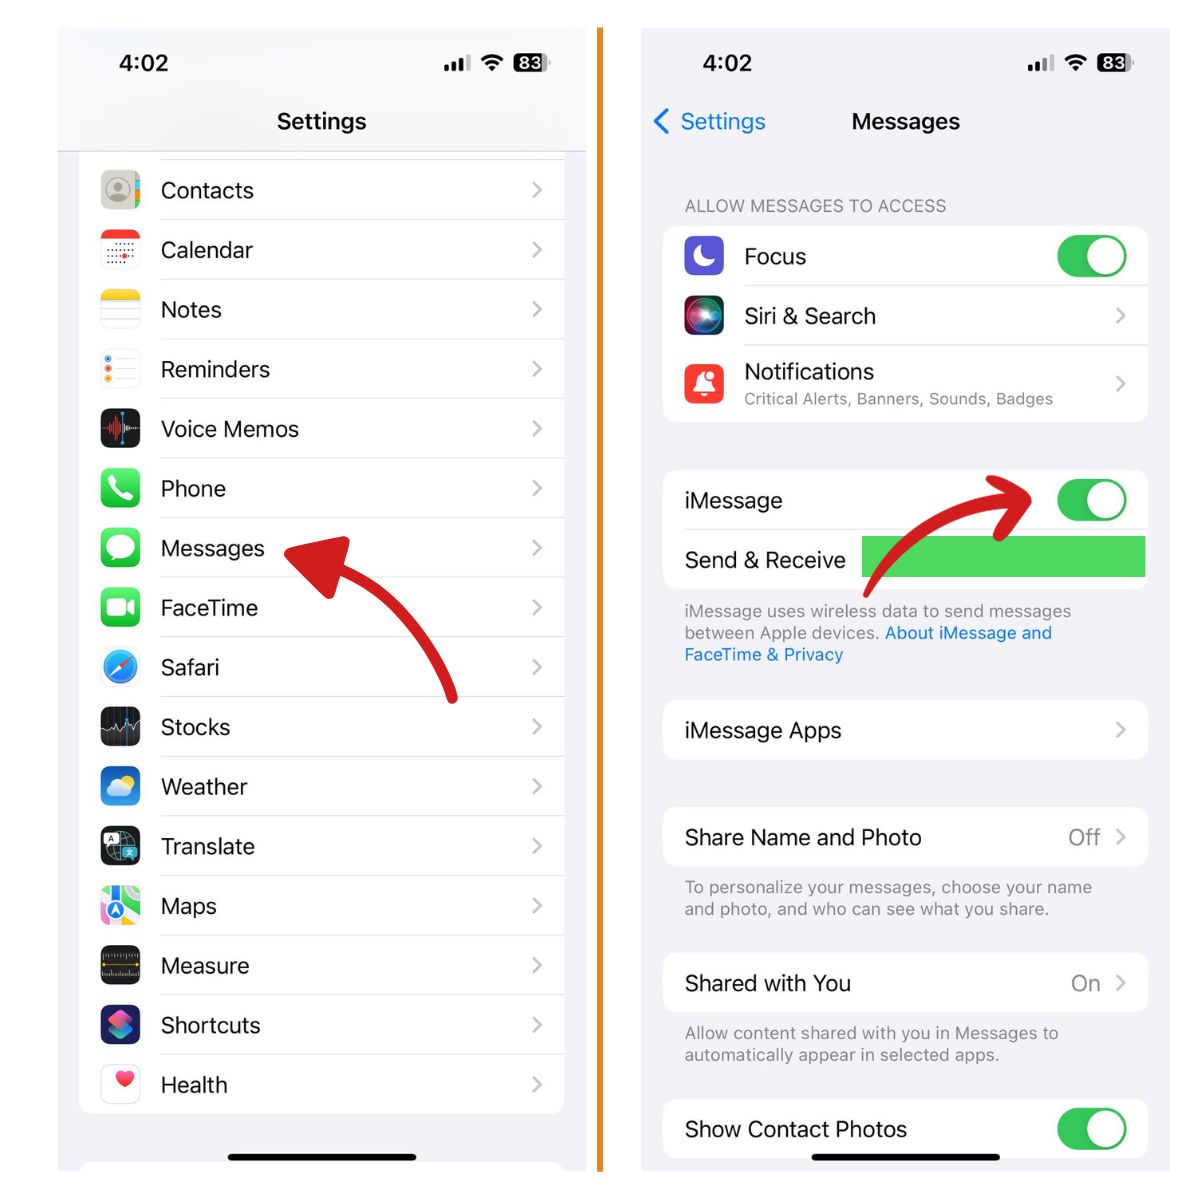
The Messages app on iPhone utilizes Apple’s iMessage service to send voice messages. So the first step is making sure iMessage is enabled.
To enable iMessage:
- Open the Settings app on your iPhone 13.
- Tap on “Messages”.
- Toggle on the switch next to “iMessage”.

Both you and the recipient need to have iMessage enabled to send and receive voice messages.
Record a Voice Message
Once iMessage is setup, you can start recording voice messages. Here’s how:
1. Open a Message Thread
Launch the Messages app and open an existing conversation or start a new message thread. Make sure the recipient has iMessage enabled.
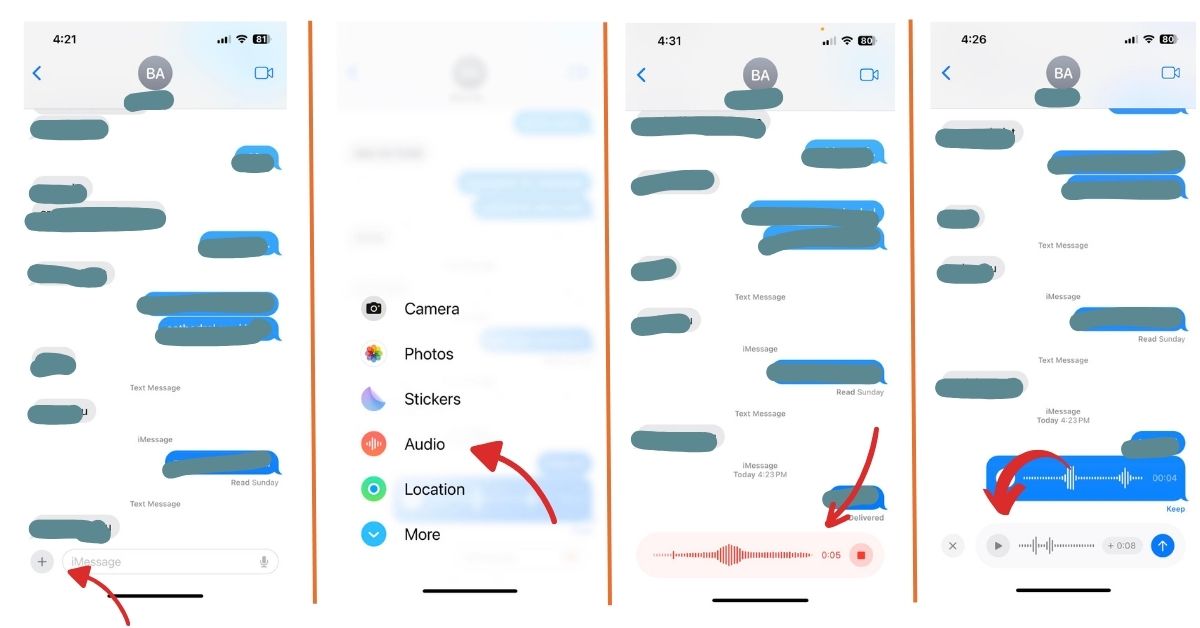
2. While in the conversation thread, press the plus icon and tap Audio
At the bottom, press and hold the “+” icon to the left of the text box. Then tap audio, this will start recording your voice message.
3. Tap the stop button to end recording.
Once finished, tap the red box to stop recording.
4. Review the Message
Tap the play icon to listen back before sending.
5. Send the Voice Message
If you’re happy with the recording, tap the upward arrow icon to send the voice message to the recipient.

That’s all there is to sending voice messages on iPhone 13! It’s a straightforward process.
Listen to Received Voice Messages
When someone sends you a voice message, you’ll see a waveform appear in the Messages thread. Here’s how to listen to it:
- Open the message thread with the voice message.
- Tap on the waveform to play the audio file.
- You can also raise your iPhone 13 to your ear and it will automatically play incoming voice messages.
By default, voice messages get deleted 2 minutes after you listen to them. To save an important voice message, tap the “Keep” link underneath.
Change Voice Message Auto-Deletion
If you don’t want your voice messages to disappear after listening, you can turn off auto-deletion:
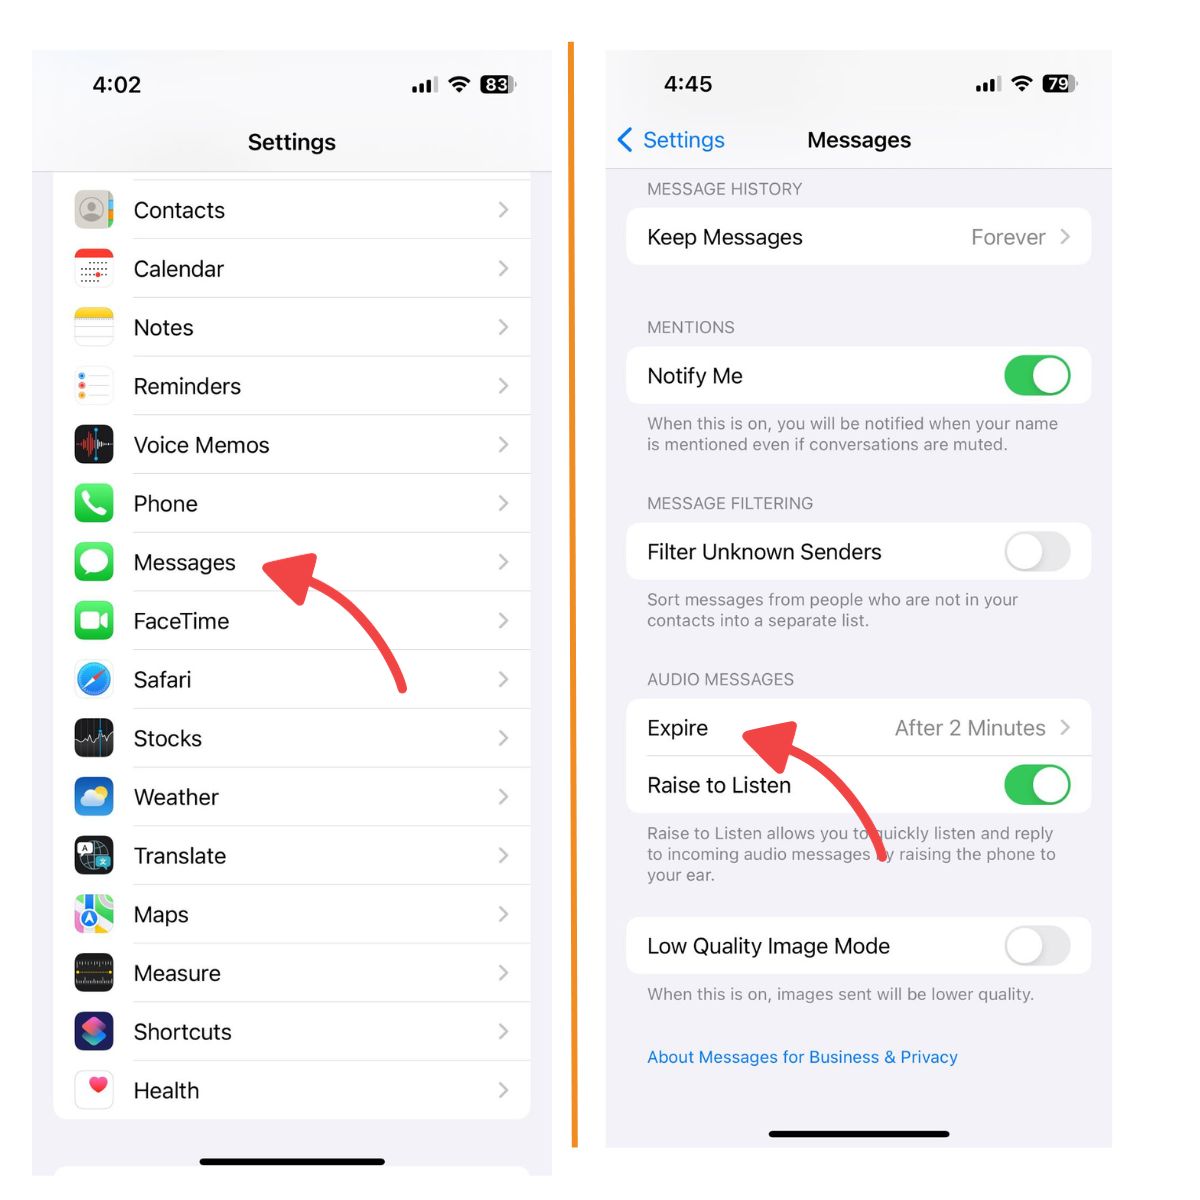
- Open the Settings app on your iPhone.
- Tap on “Messages”.
- Tap on “Expire” under Audio Messages.
- Select “Never”.

This will save all incoming and outgoing voice messages. Your recipients’ messages will still auto-delete unless they change their settings.
Use Voice Memos as Alternative
The Messages app only works between Apple devices. If you want to send voice messages to Android users, use the Voice Memos app instead:
- Open Voice Memos and tap the red record button.
- Speak your message then tap stop when complete.
- Tap the share icon (box with arrow), then select a sharing method.
This will let you send the voice memo as an audio file through SMS, email, social media, and more.
Set a Custom Voicemail Greeting
You can also record a custom greeting callers will hear when reaching your voicemail:
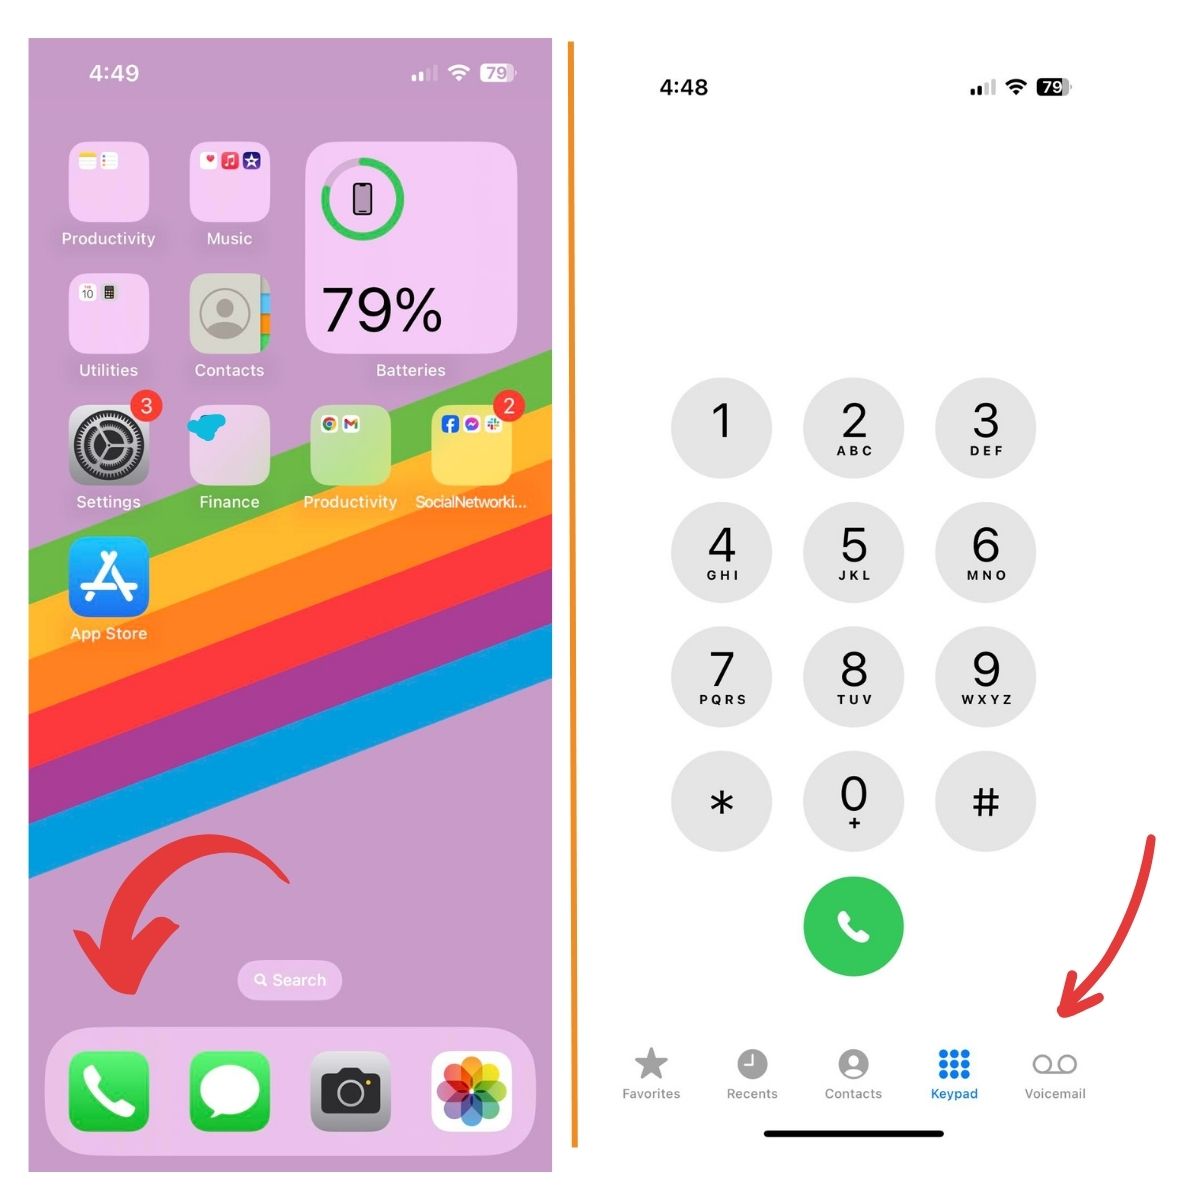
- Open the Phone app on your iPhone.
- Tap on “Voicemail” in the bottom right.
- Select “Greeting”.
- Choose “Custom” then tap “Record” to start recording your greeting.
- Tap “Stop” when finished, then “Save”.

Your newly recorded custom greeting will now play when callers reach your voicemail.
Voice Message Benefits
Compared to text messages, voice messages have several benefits:
- Convey emotion through tone of voice.
- Send longer, more detailed messages.
- Save time compared to typing long texts.
- Avoid autocorrect changing words.
- No character limits.
However, there are a few drawbacks to keep in mind:
- Less discreet than texting.
- Long messages use more data.
- Recipient has to replay to absorb details.
- Can’t edit a recording after sending.
Overall though, voice messaging is super convenient on iPhone. Follow the steps above to start capturing your thoughts and communicating more effectively using your voice!