
iPhone Won’t Connect WiFi? 12 Fixes to Get Back Online (Restart, Update + More)
You grab your iPhone, ready to browse or stream, only to find it won’t connect to WiFi. Don’t panic! There are several quick fixes you can try to get your iPhone connecting again. Follow these steps to resolve WiFi issues on your iPhone.
1. Check Your Proximity to the Router
If your iPhone can’t find or connect to WiFi, you may simply be too far from the wireless router. Move closer and see if the network appears under Settings > WiFi. Stay near the router for best connectivity.
2. Restart Your iPhone
A quick restart can clear up minor software glitches disrupting WiFi.
Step 1: Press and hold the side/top button until the power slider appears.
Step 2: Power down, wait 30 seconds, then power back on and check WiFi.
3. Toggle Airplane Mode On/Off

Switch on Airplane Mode for 30 seconds to disable wireless connections. Turn it off and see if WiFi connects again. Toggling Airplane Mode refreshes your connections.
4. Forget the WiFi Network
If your iPhone remembers old network details causing issues, forget the problem network.
Step 1: Settings
Step 2: Click on WiFi
Step 3: Tap “i”
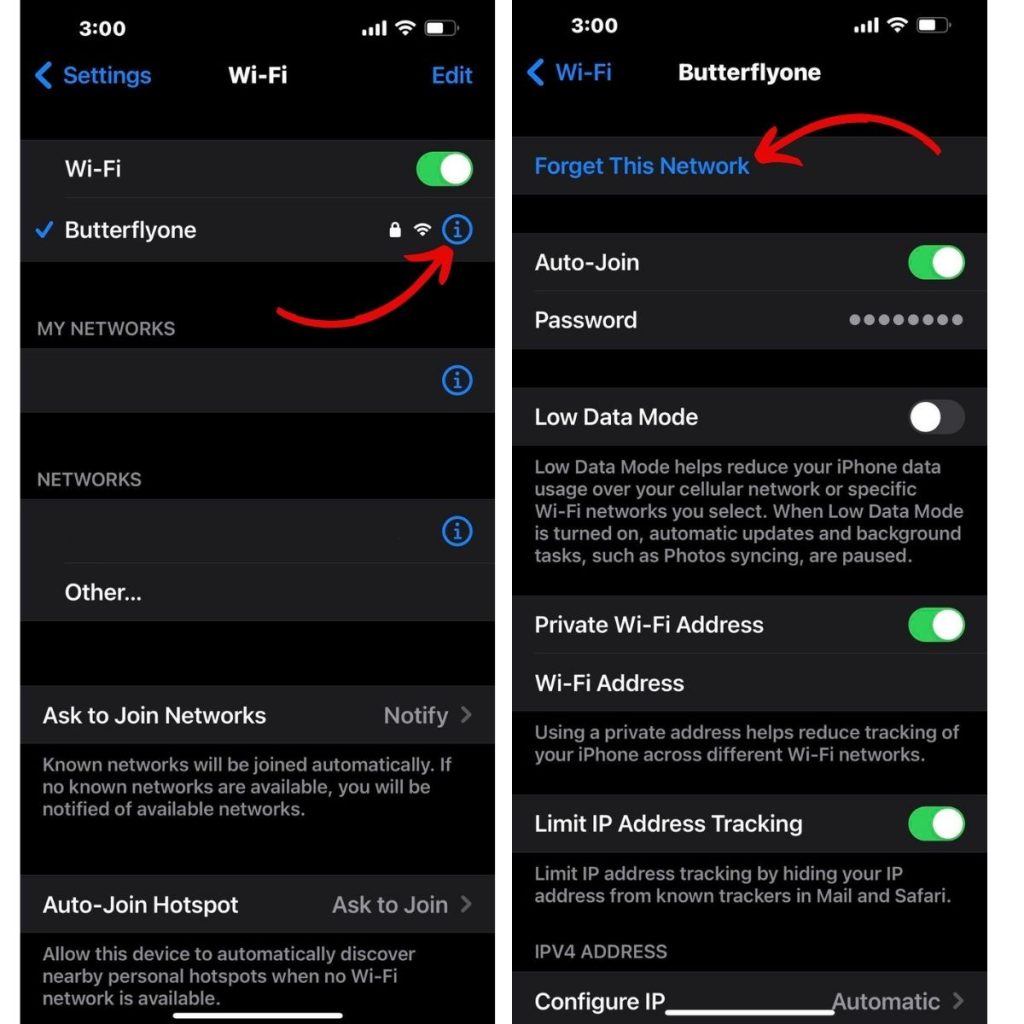
Step 4: Forget This Network.
Step 5: Rejoin by entering the password again.
5. Check for Software Updates
Update to the latest iOS version to fix any WiFi bugs.
Step 1: Go to Settings
Step 2: General
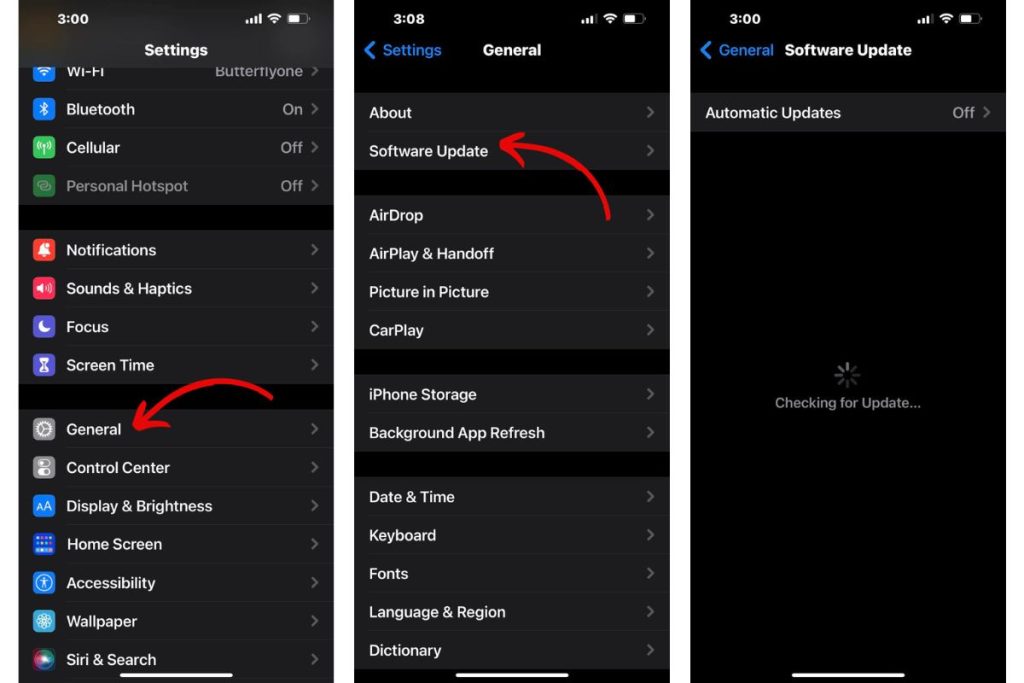
Step 3: Software Update
Step 4: Update to install available updates and ensure optimal performance.
6. Reset Network Settings
Factory reset all network settings
Step 1: Settings
Step 2: General or Transfer or Reset iPhone
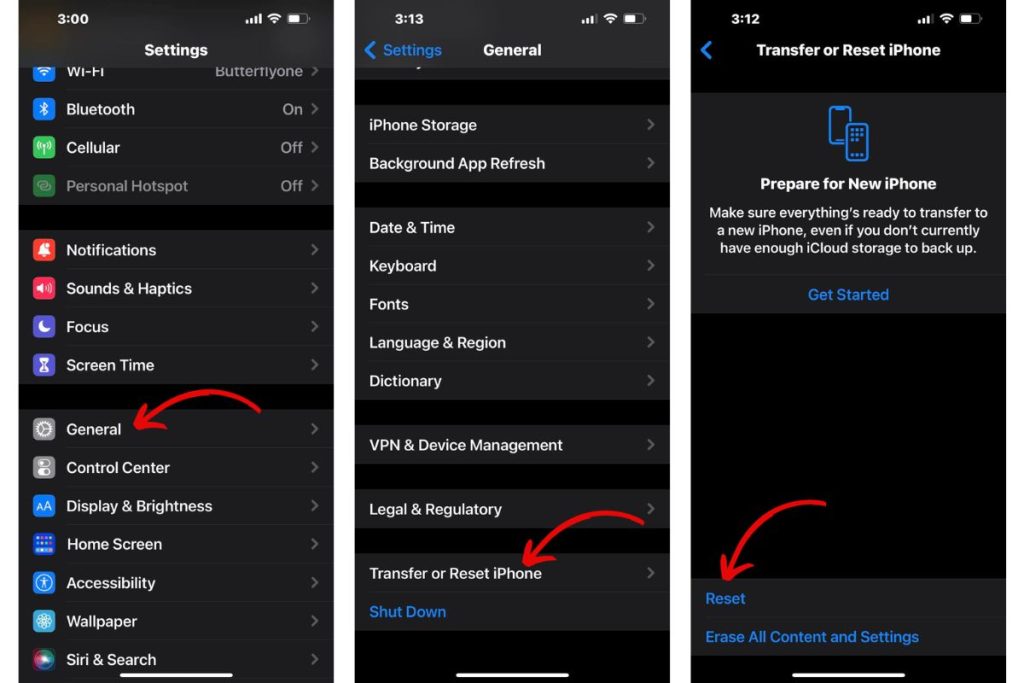
Step 3: Reset
Step 4: Reset Network Settings. This erases saved WiFi networks so you’ll need to rejoin them.
7. Try Other Browsers and Apps
See if WiFi works in other apps and browsers to determine if the issue is isolated to one. Force quit then reopen problematic apps to refresh the connection.
8. Disable VPN Apps
Some VPN apps prevent internet access when not enabled. Check their settings and turn off any toggles blocking web access when disabled.
9. Check Router Connection
Unplug your router for one minute then plug back in to reboot it and refresh the connection. Ensure all cables are securely plugged into the router and modem while unplugged.
10. Connect Another Device to the Network
See if other devices can connect to the WiFi network in question. If it’s only your iPhone with issues, the problem is with your device. But if no devices can connect, there may be a router or ISP issue.
11 .Try Other WiFi Networks
Take your iPhone to another location and attempt to connect to a different WiFi network there. If it fails to connect at all, contact Apple support for help diagnosing your device.
12. Factory Reset the iPhone
As a last resort, factory reset your iPhone.
Step 1: Settings
Step 2: General.
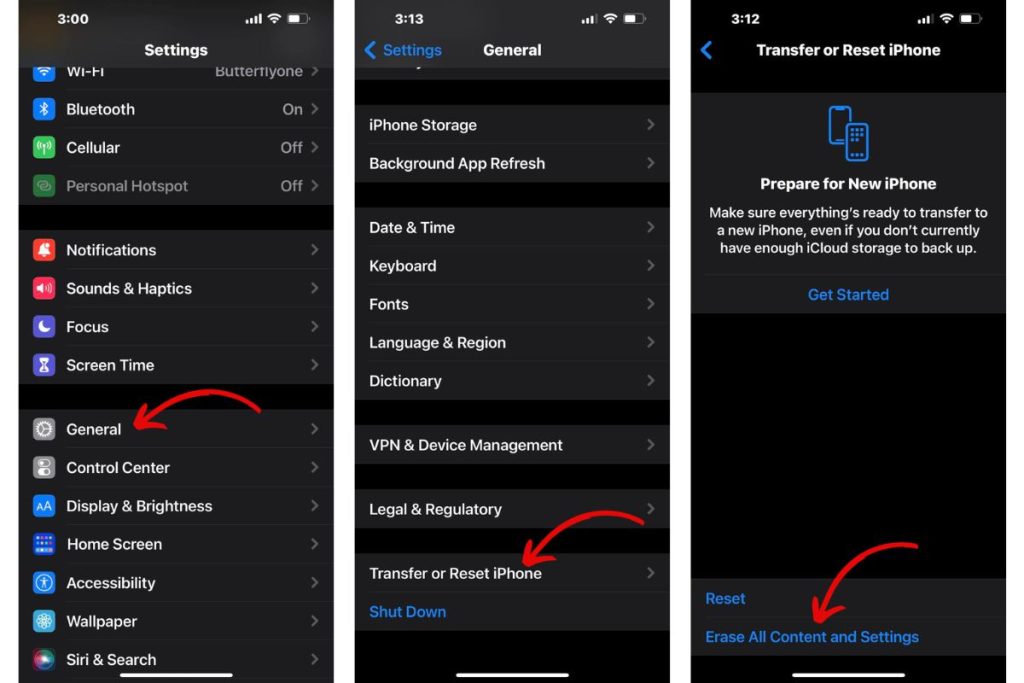
Step 3: Reset
Step 4: Erase All Content and Settings. Make sure you have a current backup first!
With some trial and error using these troubleshooting tips, you should be able to get your iPhone connecting to WiFi again in no time. Don’t hesitate to contact support if you need help resolving persistent WiFi connectivity problems.