Having your iPad constantly disconnect or drop Wi-Fi connection can be incredibly frustrating. You rely on stable Wi-Fi for streaming, web browsing, and using important apps but when the connection starts randomly dropping, it interrupts whatever you’re doing. Thankfully, there are several effective troubleshooting steps you can take to stop frequent Wi-Fi disconnects on your iPad. Let’s dive into the most common causes and proven solutions.

Common Causes of Wi-Fi Disconnects
Here are the most common culprits behind random Wi-Fi drops on the iPad:
- Congested Wi-Fi channels from nearby networks
- Outdated router firmware needing an update
- Weak Wi-Fi signal strength and range limitations
- Software bugs or glitches on the iPad itself
- Incorrect network settings configured
Troubleshooting Wi-Fi Drops on iPad
Frequent Wi-Fi disconnects are usually caused by router issues, software problems, weak signals, or incorrect iPad settings. By optimizing router placement, updating your iPad’s software, resetting network settings, and changing Wi-Fi assist settings, you can stabilize your wireless connection.
Now let’s dive into each of the aforementioned solutions.
1st solution: Optimize Your Router Placement
Optimizing router placement is necessary when dealing with Internet connectivity issues including Wi-Fi drops because the location of your router can have a significant impact on the signal strength and range of your Wi-Fi network.
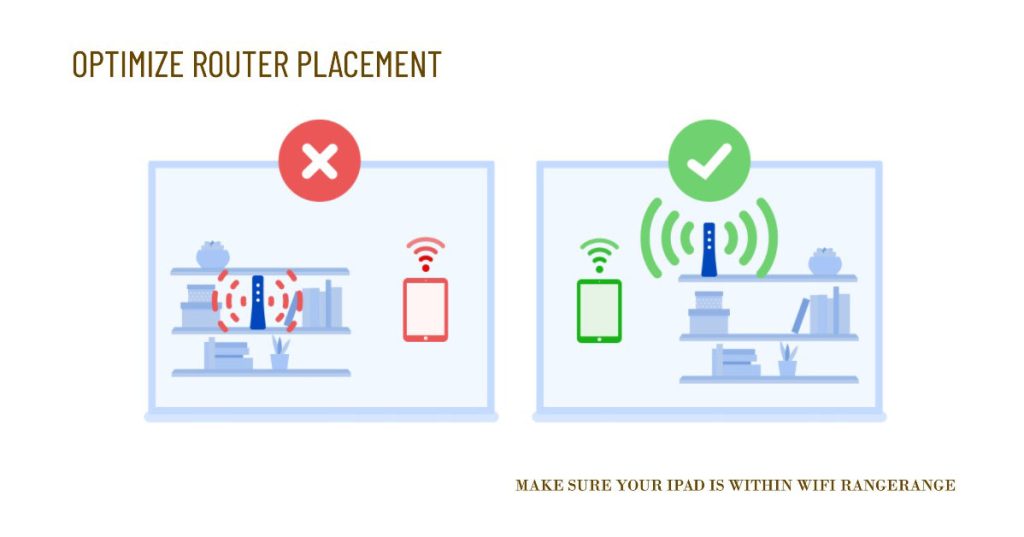
There are a few reasons why router placement is important:
- Distance: The further a device is from the router, the weaker the Wi-Fi signal will be. This is because Wi-Fi signals attenuate, or weaken, over distance.
- Obstructions: Physical objects can also obstruct Wi-Fi signals. For example, walls, floors, and furniture can all block or weaken Wi-Fi signals.
- Interference: Other electronic devices can also interfere with Wi-Fi signals. For example, microwaves, cordless phones, and baby monitors can all cause Wi-Fi interference.
By placing your router in a central, unobstructed location, you can minimize the distance between the router and your devices, reduce the number of obstructions in the way of the signal, and minimize interference from other electronic devices.
Here are some tips for optimizing router placement:
- Place the router in a central location in your home or office.
- Place the router up high, away from obstructions.
- Avoid placing the router near metal objects or appliances.
- Keep the router away from other electronic devices that may cause interference.
- If you have a large home or office, you may want to consider using a Wi-Fi extender or mesh network to boost the signal strength and range of your network.
If you are experiencing Wi-Fi drops, optimizing the placement of your router is a good first troubleshooting step. It is a quick and easy fix that can often resolve the problem.
2nd solution: Reboot your Router
When you reboot your router, you are essentially turning it off and on again. This process clears the router’s memory and resets all of its settings. This can help to resolve a variety of issues, including frequent Wi-Fi drops.
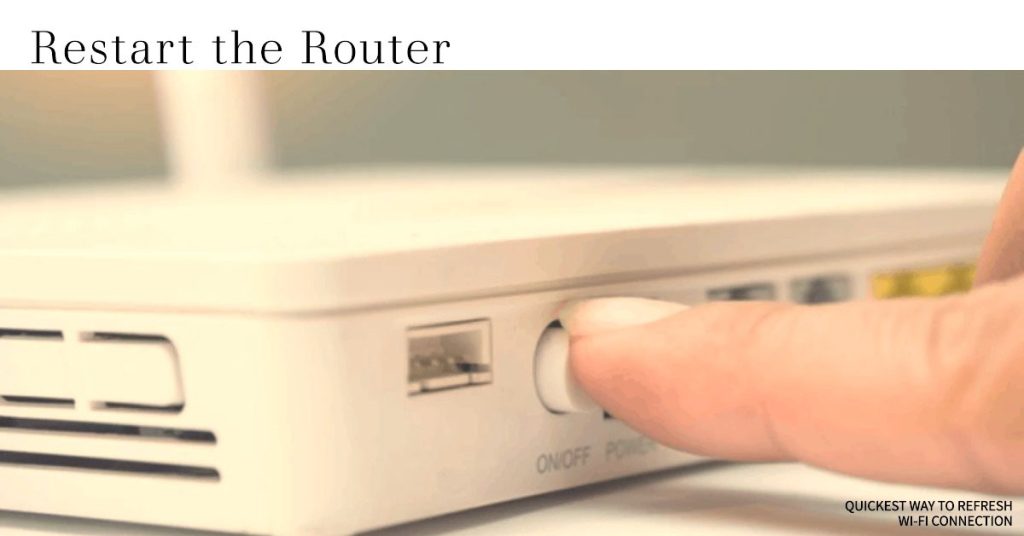
There are a few ways to reboot your router. You can unplug it from the power outlet and then plug it back in after a few seconds. You can also use the router’s management interface to reboot it. To do this, you will need to log into the router’s interface using a web browser.
Once you have rebooted your router, it will take a few minutes for it to start up and reconnect to your internet service provider. After that, you should be able to connect to your Wi-Fi network with your iPad.
There are a few reasons why rebooting your router can help to fix frequent Wi-Fi drops on your iPad:
- Clears the router’s cache: The router’s cache stores information about the devices that are connected to it. This information can sometimes become corrupted, which can lead to connection problems. Rebooting the router clears the cache and resets the connection information.
- Resets the router’s settings: If you have made any changes to the router’s settings, such as the Wi-Fi channel or the security settings, these changes could potentially be causing the connection problems. Rebooting the router resets all of the settings to the factory defaults.
- Fixes minor software glitches: Routers are complex devices, and they can occasionally experience minor software glitches. Rebooting the router can help to fix these glitches and improve the router’s performance.
If you are experiencing frequent Wi-Fi drops on your iPad, rebooting your router is a good first troubleshooting step. It is a quick and easy fix that can often resolve the problem.
3rd solution: Update Router and iPad Software
Updating your router and iPad software is necessary when dealing with Wi-Fi drops because it can fix bugs and improve performance. Software updates often include security patches and other fixes that can resolve issues that are causing Wi-Fi drops. Additionally, software updates can also include new features and performance improvements that can make your Wi-Fi connection more stable and reliable.
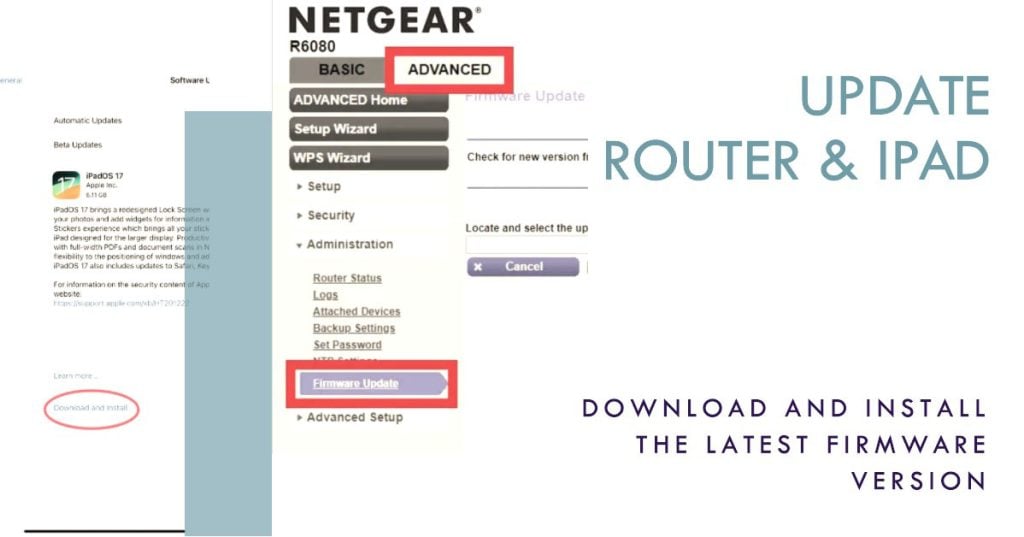
Here are some specific examples of how updating your router and iPad software can help to fix Wi-Fi drops:
- Security patches: Software updates often include security patches that can fix vulnerabilities that could be exploited by attackers to disrupt your Wi-Fi connection.
- Bug fixes: Software updates can also fix bugs that are causing Wi-Fi drops. For example, a bug in the router’s firmware could be causing it to crash or reboot frequently, which could disrupt your Wi-Fi connection.
- Performance improvements: Software updates can also include performance improvements that can make your Wi-Fi connection more stable and reliable. For example, an update to the router’s firmware could improve its range or speed.
If you are experiencing frequent Wi-Fi drops, it is a good idea to check for software updates for your router and iPad. You can usually find software updates for your router by logging into the router’s management interface. To check for software updates on your iPad, go to Settings > General > Software Update.
If you are still having trouble connecting to your Wi-Fi network after updating your software, you may try the next suggested solution.
4th solution: Disable Wi-Fi Assist
Wi-Fi Assist is a feature on iOS and iPadOS devices that automatically switches to cellular data when your Wi-Fi connection is weak. This can be helpful if you are in an area with poor Wi-Fi coverage, but it can also lead to increased data usage and unexpected charges if you are not on an unlimited data plan.
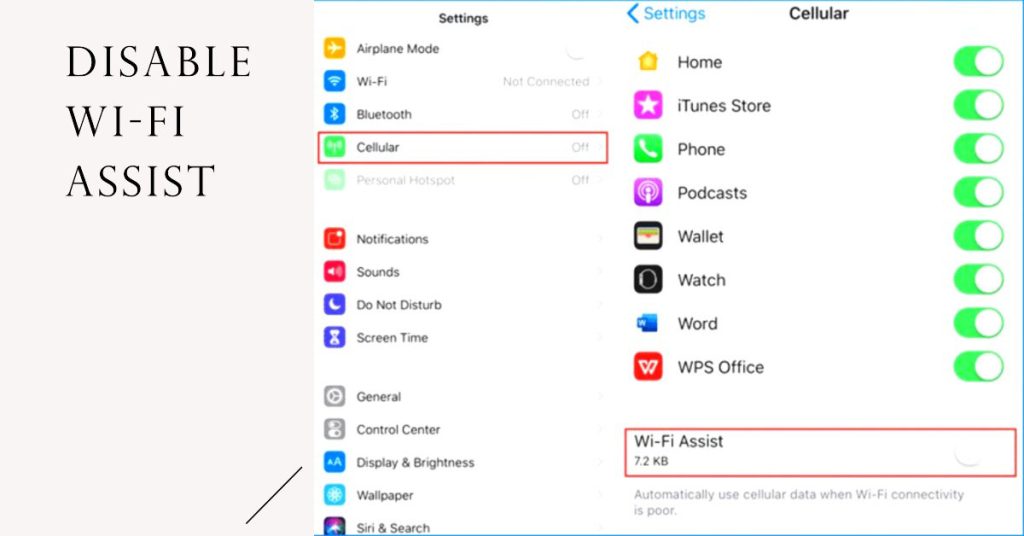
To disable Wi-Fi Assist on your iPad, follow these steps:
- Open the Settings app.
- Tap Cellular or Mobile Data.
- Scroll down and tap the toggle for Wi-Fi Assist to turn it off.
Once Wi-Fi Assist is disabled, your iPad will no longer switch to cellular data when your Wi-Fi connection is weak. This can help to reduce your data usage and prevent unexpected charges.
Disabling Wi-Fi Assist can also help to fix frequent Wi-Fi drops on your iPad. In some cases, Wi-Fi Assist can interfere with your iPad’s connection to your Wi-Fi router. Disabling the feature can help to resolve this issue.
5th solution: Reset Network Settings on iPad
Resetting your network settings is also deemed a potential solution as it can clear out any problematic Wi-Fi configs causing disconnects.
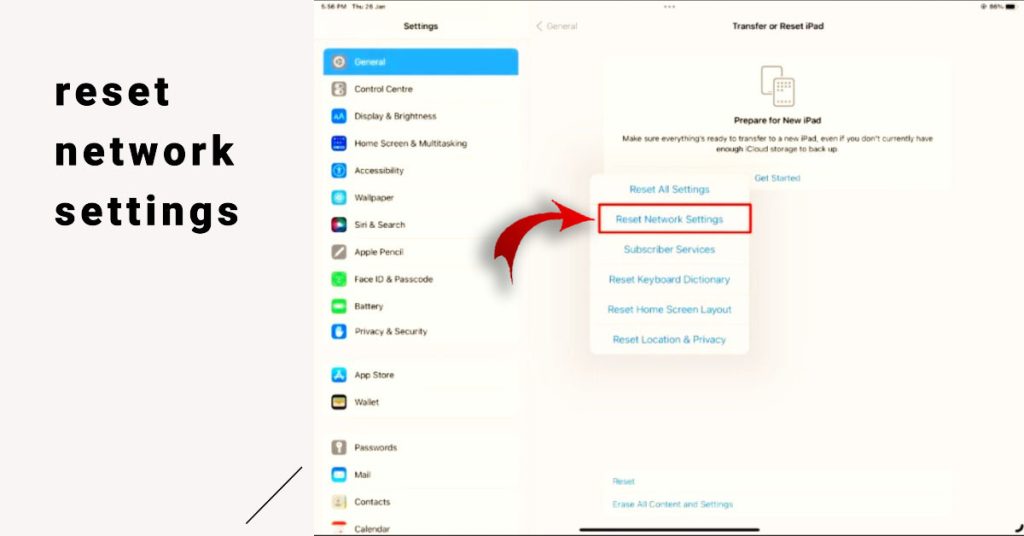
To reset network settings on iPad, follow these steps:
- Open the Settings app.
- Tap General.
- Scroll down and tap Transfer or Reset iPad.
- Tap Reset.
- Tap Reset Network Settings.
- If prompted, enter your passcode.
- Tap Reset to confirm.
Resetting network settings on iPad can be necessary when dealing with Wi-Fi drops for a few reasons:
- To clear corrupted network settings: Over time, your iPad’s network settings can become corrupted, which can lead to a variety of problems, including Wi-Fi drops. Resetting network settings will clear all of your network settings and restore them to their factory defaults.
- To fix minor software glitches: Like any other electronic device, iPads can occasionally experience minor software glitches that can cause Wi-Fi drops. Resetting network settings can help to fix these glitches and improve your iPad’s Wi-Fi performance.
- To remove conflicting network settings: If you have made any changes to your iPad’s network settings, such as the Wi-Fi channel or the security settings, these changes could potentially be conflicting with each other and causing Wi-Fi drops. Resetting network settings will remove all of your custom network settings and restore them to their factory defaults.
It is important to note that resetting network settings will also erase all of your saved Wi-Fi networks and passwords. This means that you will need to manually reconnect to all of your Wi-Fi networks after resetting your network settings.
When to Contact your Internet Service Provider?
With focused troubleshooting like optimizing router placement, updating software, resetting iPad network settings, and disabling Wi-Fi assist, you should be able to stop frustrating frequent Wi-Fi disconnects on your iPad. But if none of these helps, then contacting your ISP is recommended. The problem might be from within the network server and not on your iPad’s network system.