When your iPhone 13’s cellular data isn’t working, it affects texting, calls, and internet-based activities, rendering your device nearly unusable. It’s crucial to address this issue immediately to regain full functionality. This guide will outline straightforward troubleshooting steps to help you quickly resolve and optimize your iPhone 13’s cellular data connectivity.
1. Force restart your iPhone
Before anything else, make sure that such a problem is not just due to a minor glitch in the system. Thus, the first thing you have to do is to refresh the memory of your device by doing the Forced Restart.
Here’s how you do it:
Step 1: Press and quickly release the Volume Up button.
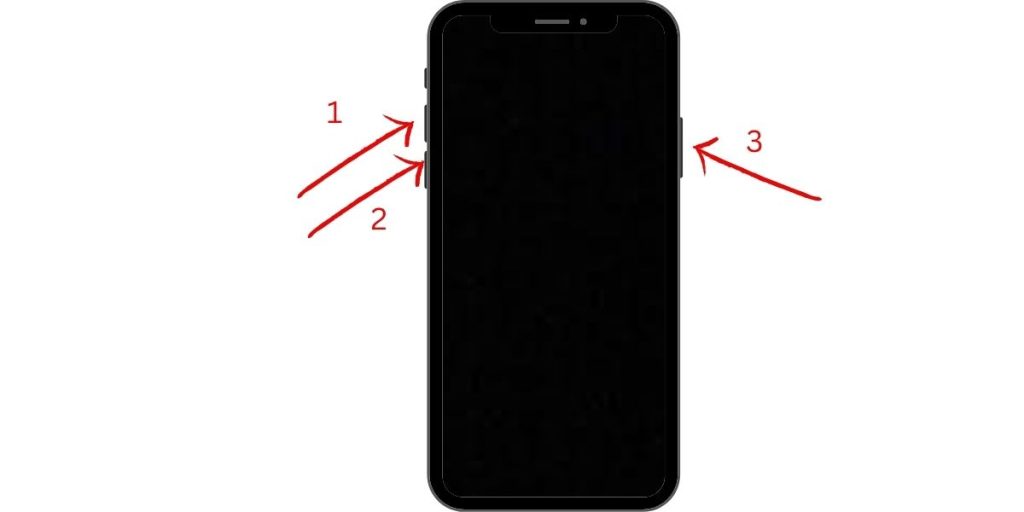
Step 2: Press and release the Volume Down button.
Step 3: Immediately after releasing the Volume Down, press and hold the Power key for 8 seconds.
Step 4: When the Apple logo appears, release the Power button and allow your iPhone to continue booting up.
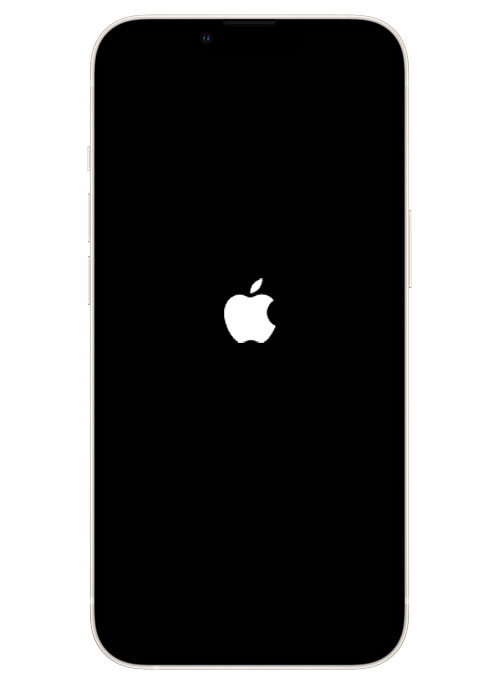
Once your iPhone has finished rebooting, try sending an MMS to your own number to see if it goes through. If it does, then the problem is fixed, if not, move on to the next solution.
2. Enable Airplane Mode for a few seconds
When you enable the Airplane Mode, all wireless communications on your iPhone will be disabled. But once you disable the Airplane Mode back, your device will reconnect to the networks, including the cellular data network.
This procedure might work for you. So follow these steps:
Step 1: Pull down the Control Center.
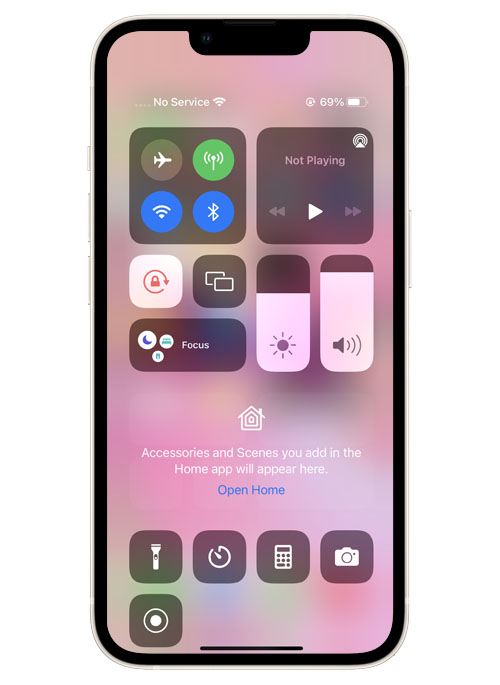
Step 2: Look for the airplane icon and tap on it to enable it.
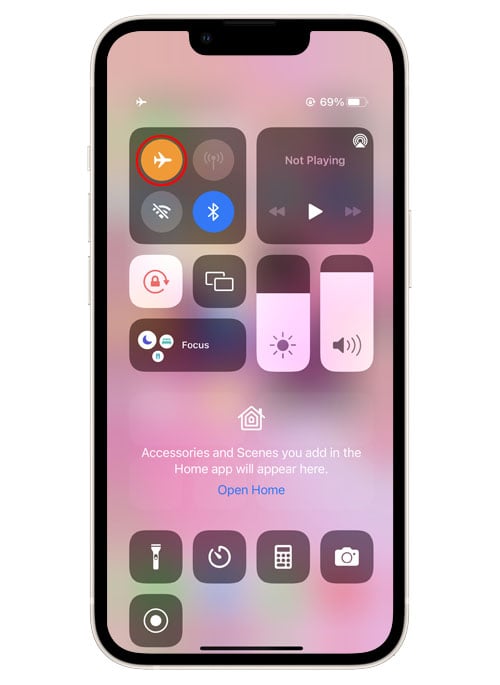
Step 3: Leave it enabled for a couple of seconds, and after that, tap on it again to disable it.
Give your iPhone a few seconds to reconnect to the networks and then try to see if the mobile data problem is fixed.
3. Disable Cellular Data & reenable it
Another thing you can do to force your iPhone to reconnect to the cellular network is by disabling the service for a few seconds and reenabling it back. It worked for some users so it’s worth a try.
Here’s how it’s done:
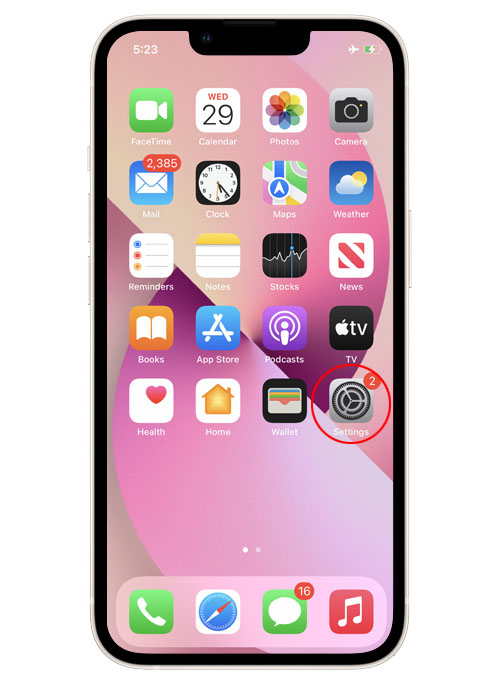
Step 1: Go to the Home screen and open the Settings app.
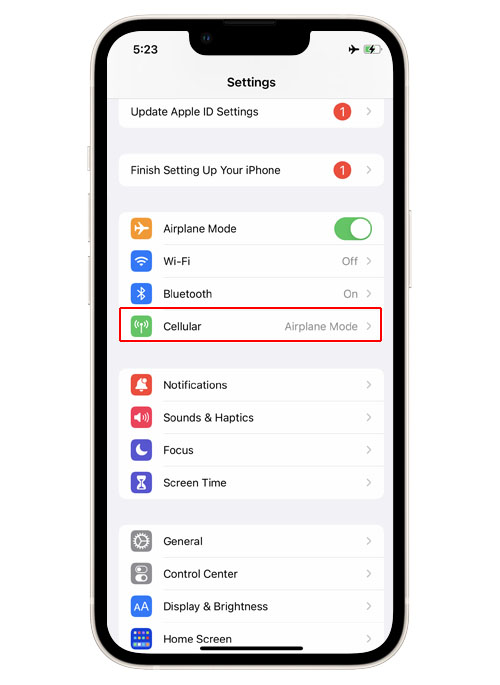
Step 2: Tap Cellular.
Step 3: Toggle Cellular Data switch to disable it.
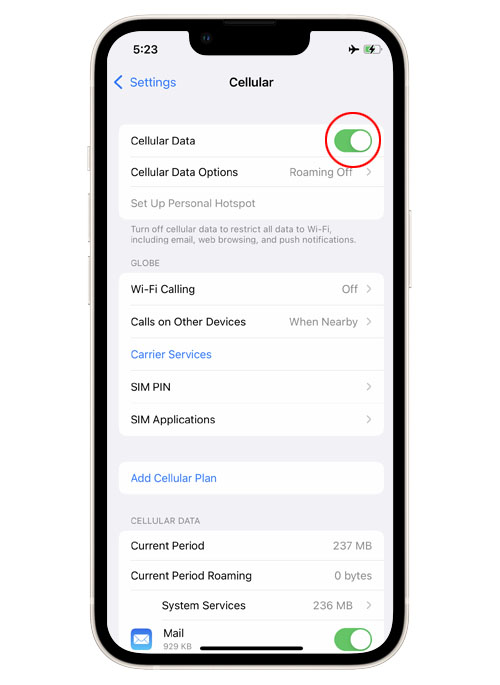
This will turn mobile data off on your device.
Step 4: Leave it disabled for a couple of seconds and then tap on the switch to enable Cellular Data again.
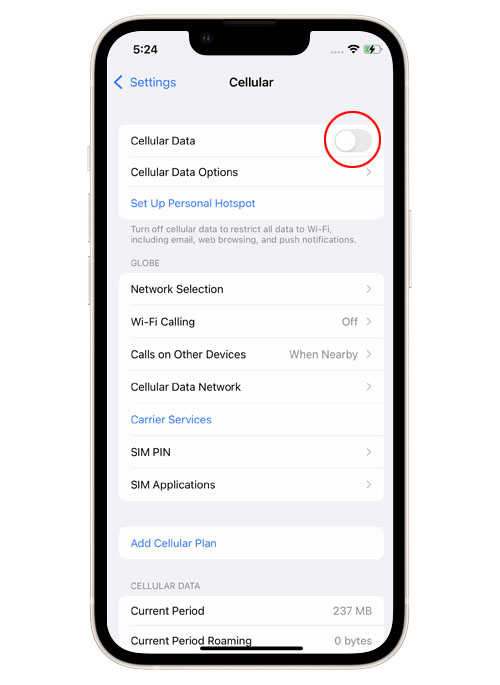
This will re-activate Cellular Data network services on your iPhone.
Now try sending a picture message to your own number to see if your iPhone 13 can now send and receive it. If still not, then move on to the next solution.
4. Reset Network Settings
After doing the first three solutions and the cellular data on your iPhone 13 is still not working, then you have to reset the network settings. This procedure is very effective when it comes to network-related issues like this.
This is how it’s done on your iPhone 13 with iOS 15:
Step 1: From the Home screen, tap Settings to open it.
Step 2: Tap General.
Step 3: Scroll down and tap Transfer or Reset iPhone.
Step 4: Tap Reset at the bottom of the screen to reveal all the options.
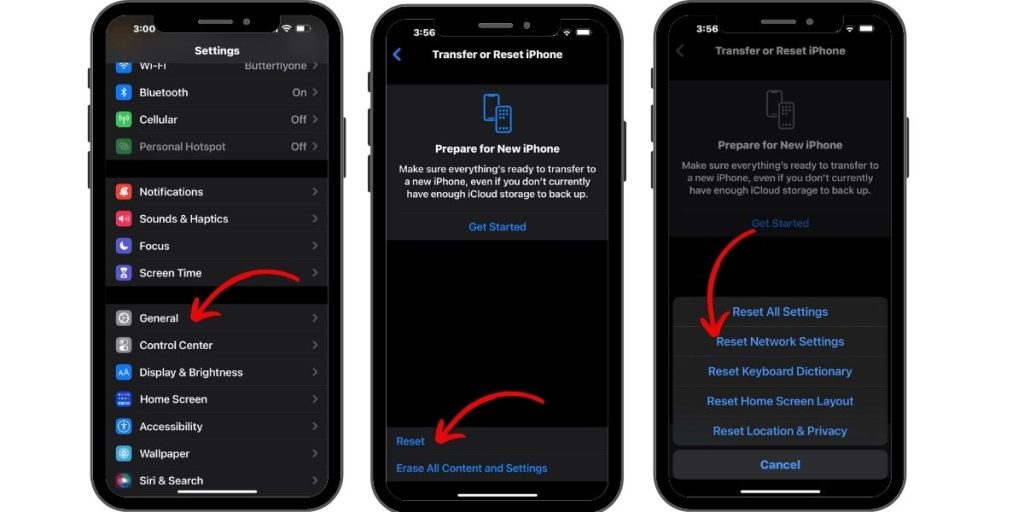
Step 5: Tap Reset Network Settings and enter your security lock if prompted.
Step 6: Tap Reset Network Settings at the bottom of the screen.
Your iPhone will reset the network and reboot.
After the restart, wait for your iPhone to reconnect to the network and then try to send an MMS to your own number.
Cellular data problems can be fixed by this procedure and the only iPhone settings that will be reset are the cellular settings, APN settings, carrier settings and no other.
Your saved Wi-Fi networks will also be deleted including your Bluetooth pairings and connections.
This might be enough to make your iPhone 13 work perfectly again. However, if the problem remains, then you have no other choice but to reset it.
5. Factory reset your iPhone 13
If the cellular service on your iPhone continues to be buggy affecting the data connection and other things, then you have no other choice but to reset your device.
A factory settings reset will delete all your files and data so make sure to create a backup of your important stuff before doing it.
When ready, follow these steps to reset your iPhone 13:
Step 1: Open settings on your iPhone.

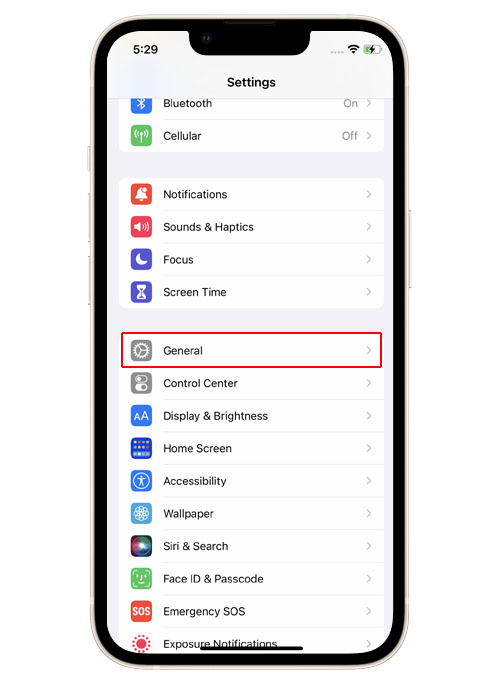
Step 2: Tap General.
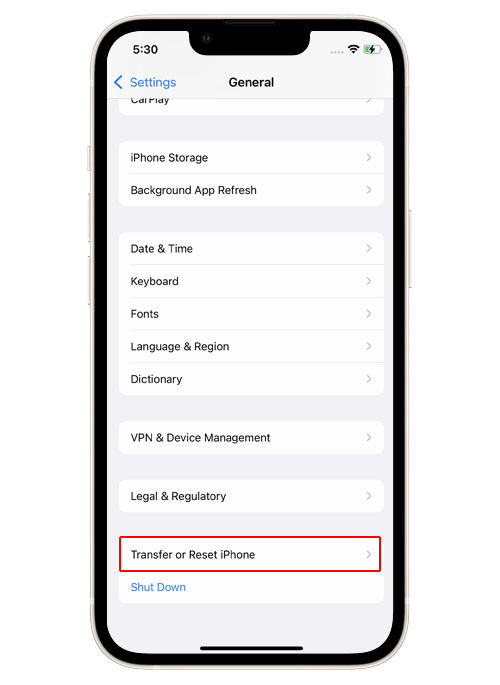
Step 3: Scroll down and tap Transfer or Reset iPhone.
Step 4: Tap Erase All Content and Settings at the bottom of the screen.
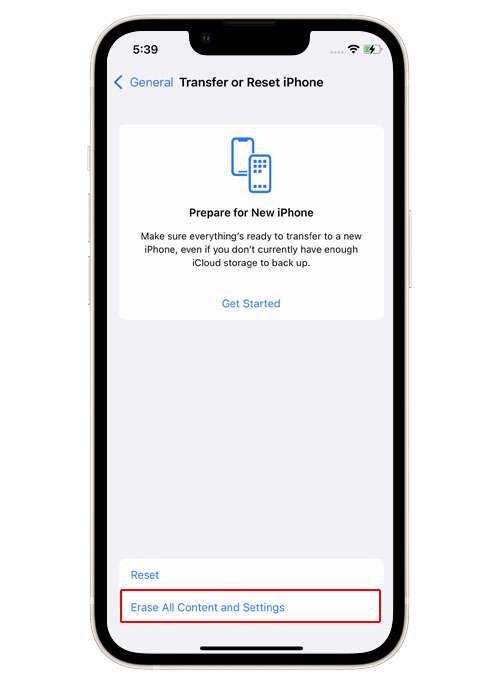
Read the information on the screen as it’s important because it tells you which ones will be deleted. You can use the information to backup your data.
Step 5: Tap Continue and then enter your security code if prompted.
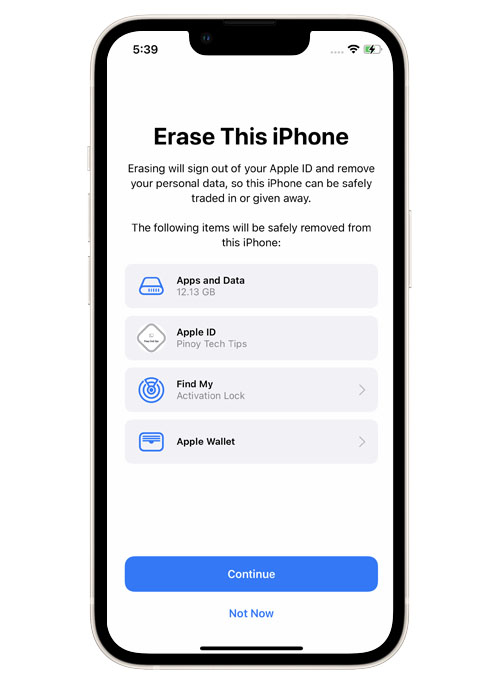
You will then be prompted to turn off the Activation Lock by entering your Apple ID password.
Step 6: Enter your Apple ID password and tap Turn Off at the top-right corner of the screen.
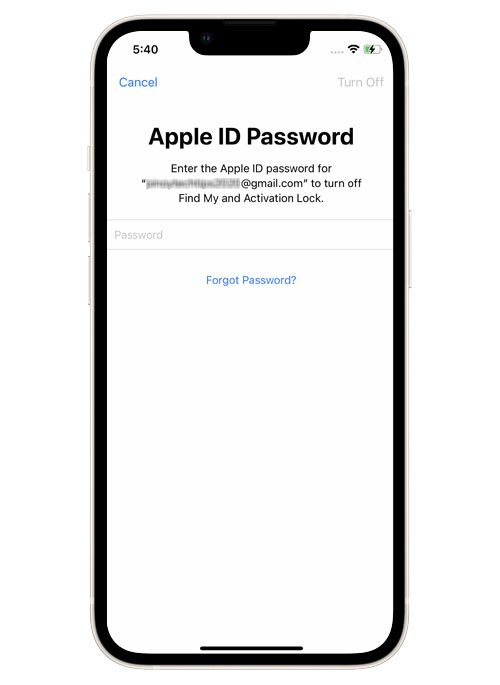
Now follow a few on-screen instructions to proceed with the Factory Reset.
Once the reset is complete, set up your iPhone 13 until it becomes ready.