Seeing a “Not Delivered” error when sending iMessages on your iPhone 11 after updating to iOS 17? Here are tips to troubleshoot the issue.
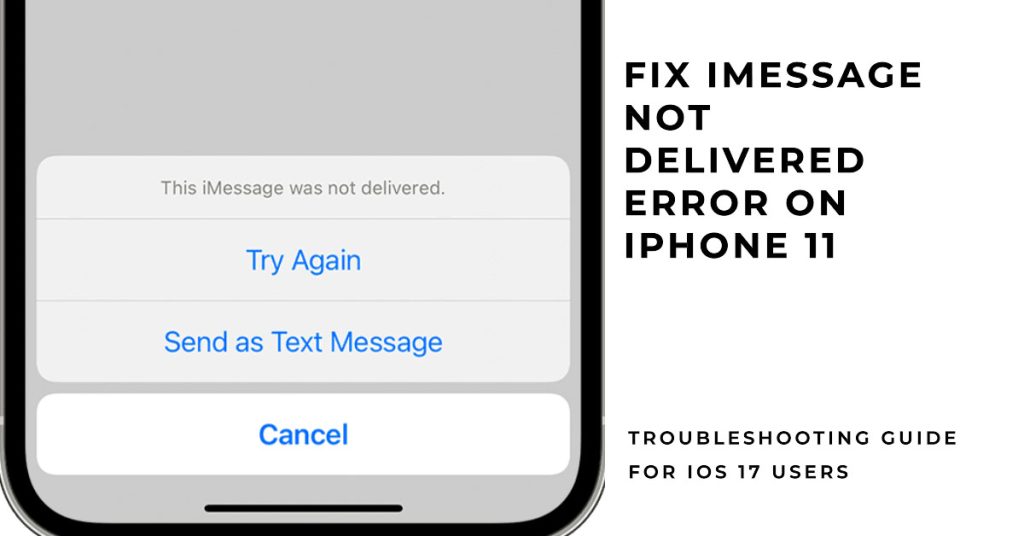
iMessage is invaluable for easy communication between your iPhone and contacts. But after installing iOS 17, you may suddenly find iMessages fail to deliver from your iPhone 11 with frustrating “Not Delivered” errors. Understandably annoying when this key messaging platform stops working properly!
While iMessage issues after a major iOS update are irritating, they can typically be resolved through some simple troubleshooting. Let’s walk through debugging steps to get iMessages sending reliably again from your iPhone 11 on iOS 17.
Why Does iMessage Fail on iPhone 11 with iOS 17?
Here are some potential causes of “Not Delivered” errors following an iOS update:
- Bug introduced in iOS 17
- Cellular data needs enabling for iMessage
- Outdated carrier settings need updating
- SIM card connection intermittently failing
- Server-side Apple issue temporarily disrupting service
By determining the trigger, you can apply the proper fix. Now that we’ve identified the possible causes, let’s troubleshoot the problem!
Troubleshooting iPhone 11 iMessage Issues on iOS 17
Post-update problems with iMessage are often due to some minor firmware glitches after the recent system changes. Here’s what you have to do to resolve “iMessage Not Delivered” error:
1st solution: Update iPhone 11 to latest iOS 17.x version if available
A lot of iPhone users have raised various complaints following the major iOS 17 update rollout. In respond, Apple pushed an emergency update in the form of iOS 17.0.1 and another follow-up iOS 17.0.2. Both these minor updates contain essential patches and security enhancements to address known post-update iOS 17 bugs affecting many iPhone users.
If you haven’t already, be sure to update your iPhone to the latest iOS version as it likely contain the required fix patch for the iMessage bug.
To update your iPhone 11, you can either do it over the air (OTA) or using a computer.
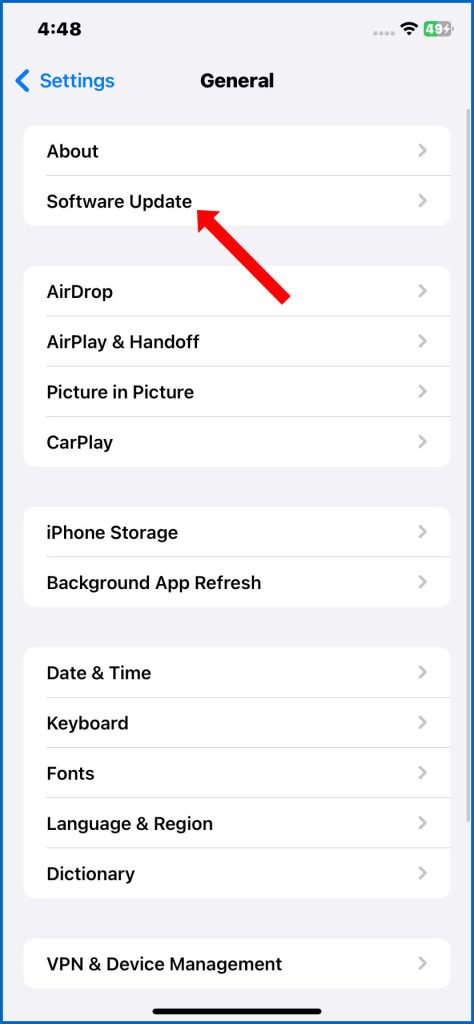
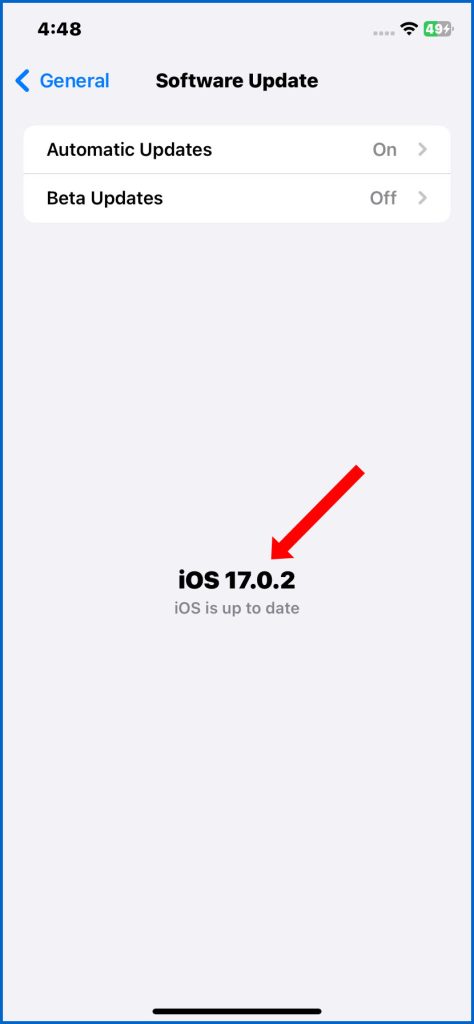
To update your iPhone 11 OTA:
- Make sure your iPhone is connected to Wi-Fi and has at least 50% battery life.
- Go to Settings > General > Software Update.
- If an update is available, tap Download and Install.
- Enter your passcode, if prompted.
- Your iPhone will download and install the update. This may take some time.
- Once the update is installed, your iPhone will restart.
To update your iPhone 11 using a computer:
- Connect your iPhone to your computer using a lightning cable.
- Open Finder (if you’re using a Mac) or iTunes (if you’re using a Windows PC).
- Select your iPhone in the sidebar.
- Click the General tab.
- Under Software Update, click Check for Updates.
- If an update is available, click Download.
- Once the update is downloaded, click Install.
- Enter your passcode, if prompted.
- Your iPhone will install the update and restart.
Please note: It is important to back up your iPhone before installing any software updates. You can back up your iPhone to iCloud or to your computer.
Here are some additional tips for updating your iPhone 11:
- Make sure you have enough storage space on your iPhone to install the update.
- Connect your iPhone to a power source while it is updating.
- Do not update your iPhone while it is in use.
2nd solution: Toggle iMessage off and back on in Settings
When you toggle iMessage off and back on in Settings, it refreshes the iMessage activation process. This can help fix post-update iMessage sending issues by clearing any temporary glitches or errors that may have occurred during the update.
Here are some of the ways that toggling iMessage off and back on can help fix post-update iMessage sending issues:
- It can clear any temporary glitches or errors that may have occurred during the update.
- It can force iMessage to reconnect to Apple’s servers.
- It can reset your iMessage preferences.
- It can refresh your iMessage activation process.
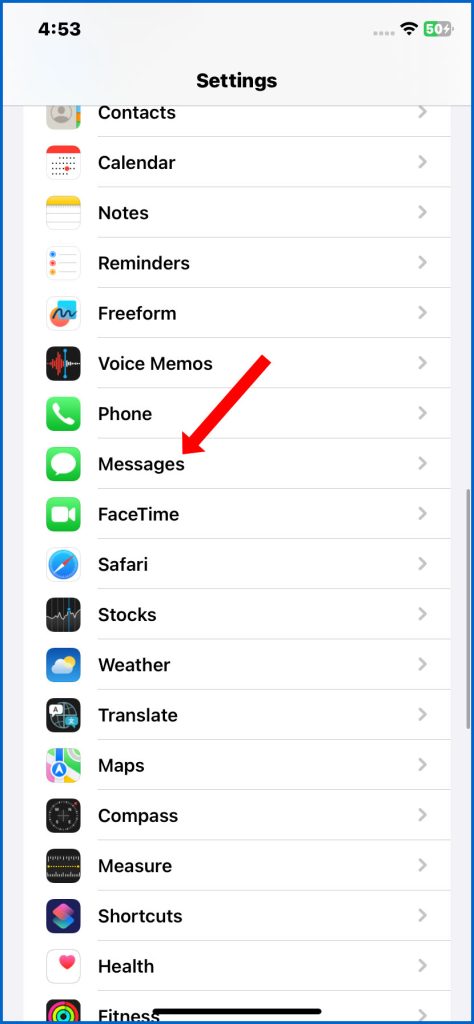
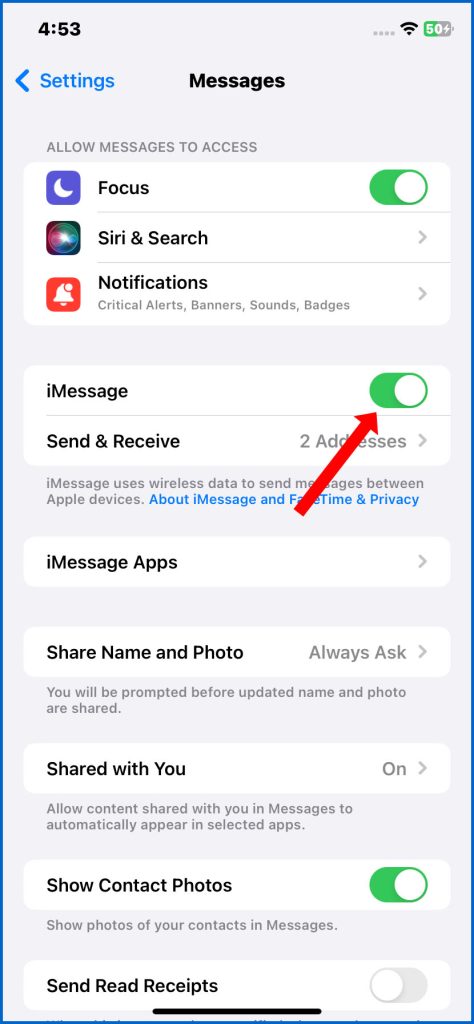
To toggle iMessage off and back on:
- Open the Settings app.
- Tap Messages.
- Toggle the iMessage switch off.
- Wait a few seconds, then toggle the switch back on.
3rd solution: Reset Network Settings
Resetting your iPhone’s network settings will delete all of your saved Wi-Fi networks, Bluetooth connections, and cellular data settings. This can help to fix post-update iMessage sending issues by clearing any corrupted or outdated settings that may be causing the problem.
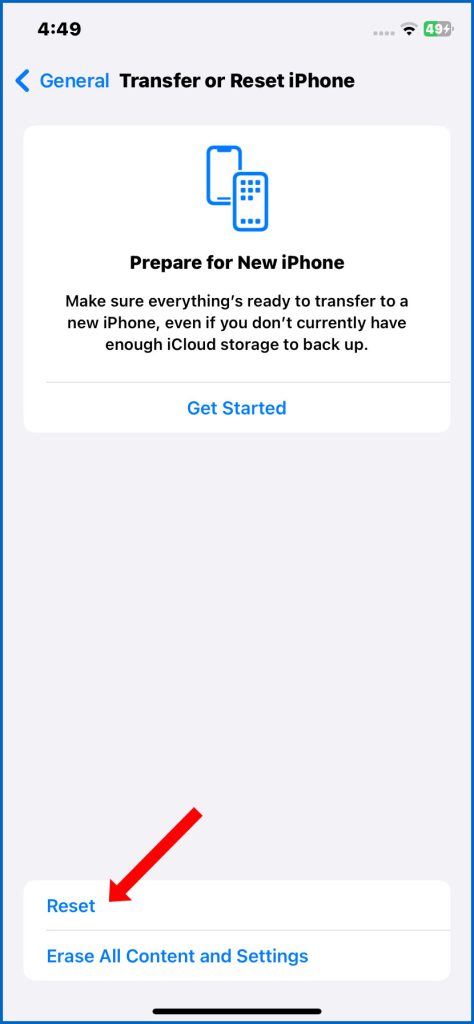
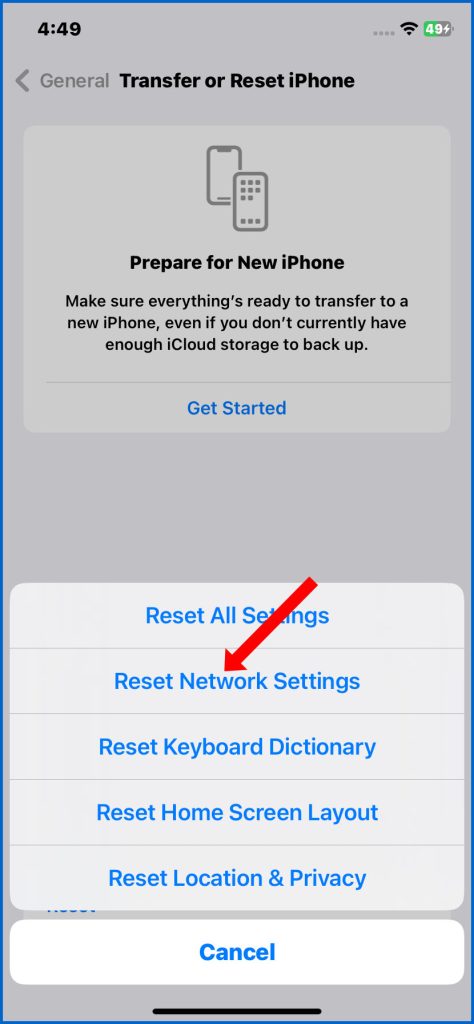
To reset your iPhone’s network settings, go to Settings > General > Transfer or Reset iPhone > Reset > Reset Network Settings. You will be prompted to enter your passcode to confirm.
After you reset your network settings, you will need to reconnect to your Wi-Fi networks and Bluetooth devices. You will also need to re-enter your cellular data settings if you have a custom APN (access point name).
4th solution: Ensure cellular data is enabled
Enabling cellular data for iMessage can help to deal with post-update problems on iPhone in a few ways:
- If your iPhone is not connected to Wi-Fi, you will still be able to send and receive iMessages over cellular data. This can be helpful if you are in an area with poor Wi-Fi coverage or if you are traveling.
- If you are having trouble sending or receiving iMessages over Wi-Fi, switching to cellular data can sometimes fix the problem. This is because cellular data networks are often more reliable than Wi-Fi networks.
- Enabling cellular data for iMessage can also help to improve the overall performance of iMessage. This is because iMessage can use both Wi-Fi and cellular data to send and receive messages. This means that iMessage can choose the fastest and most reliable network connection available, which can help to reduce the time it takes to send and receive messages.
To enable cellular data for iMessage, go to Settings > Messages > Cellular Data. Toggle the switch next to Cellular Data to the on position.
Please note that enabling cellular data for iMessage may result in additional data charges from your carrier.
5th solution: Eject and reinsert SIM card to refresh connectivity
Ejecting and reinserting your SIM card refreshes your phone’s connection to your carrier’s network. To eject and reinsert your SIM card, you will need a SIM ejector tool. This is a small, thin tool that is included with most iPhones. If you do not have a SIM ejector tool, you can use a small paperclip.
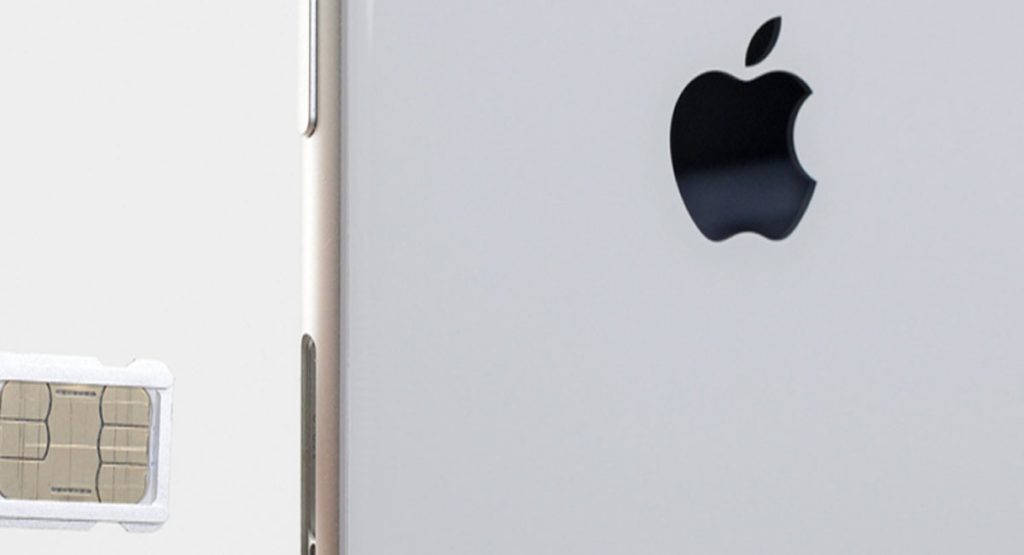
- To eject the SIM card, insert the SIM ejector tool into the small hole on the side of your iPhone. Press down on the SIM ejector tool until the SIM card tray pops out. Remove the SIM card tray from your iPhone.
- To reinsert the SIM card, place the SIM card back into the SIM card tray. Make sure that the gold contacts on the SIM card are facing down. Slide the SIM card tray back into your iPhone.
After you eject and reinsert your SIM card, your phone may take a few minutes to reconnect to the network. Once your phone is reconnected, try sending and receiving iMessages to see if the problem has been fixed.
This can help to fix post-update iMessage problems on iPhone in a few ways:
- If your phone is not properly activated on the network, ejecting and reinserting the SIM card can force it to re-activate. This can fix iMessage problems caused by activation issues.
- If you are having trouble sending or receiving iMessages, ejecting and reinserting the SIM card can clear any temporary glitches or errors that may be causing the problem.
- Ejecting and reinserting the SIM card can also help to update your phone’s carrier settings. This can be helpful if your carrier has recently released a new update that fixes iMessage problems.
One of these solutions typically resolves message sending problems after an iOS update. Stay diligent!
Preventing Future iMessage “Not Delivered” Errors
If iMessage is already working properly after applying the above solutions, follow these additional tips to avoid recurring issues with iMessage on your iPhone 11:
- Keep your iPhone OS updated
- Maintain reliable cellular service and WiFi connection
- Backup iPhone before installing major iOS updates
- Use strong and unique iCloud account passwords
Note that proactive maintenance prevents many messaging problems.
Final Thoughts
“Not Delivered” errors might seem hard to conquer but methodical troubleshooting resolves most cases. Verify settings, update configurations, restart devices, reinstall apps. With determination, you can get your iPhone 11 sending iMessages flawlessly again after upgrading to iOS 17.