This post will walk you through setting up a cellular plan on an iOS 15 and later device. Here’s a quick guide to add a cellular plan on an iPhone.
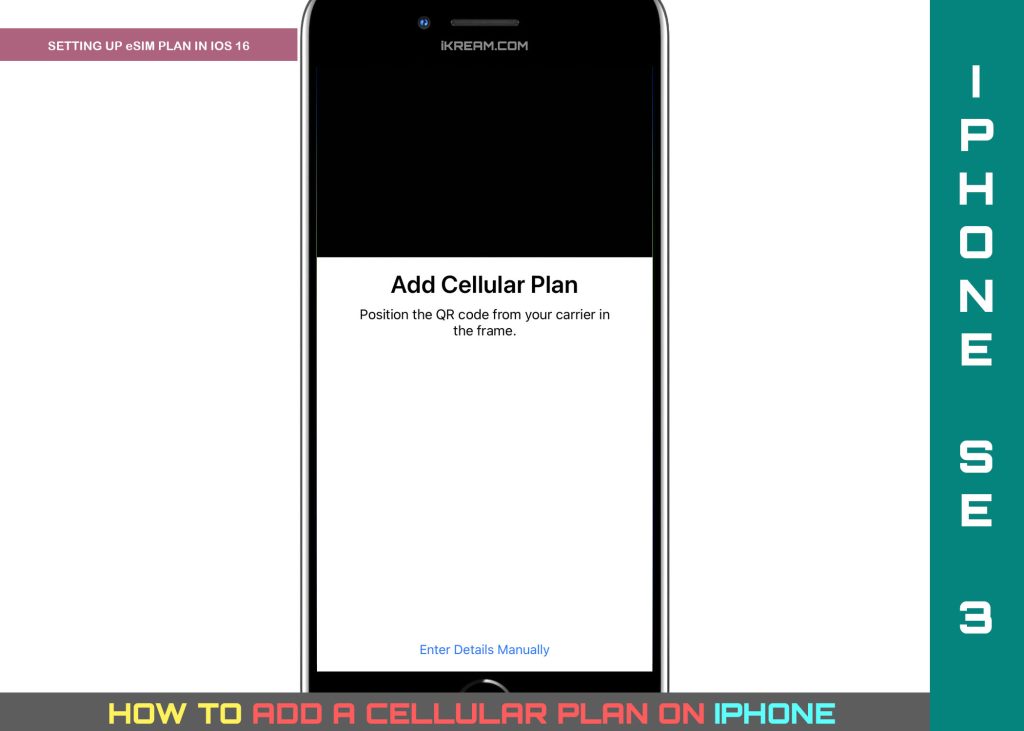
Cellular Plan (eSIM) Setup on iPhones
For an iPhone to have a cellular connection, it needs a SIM from a carrier either a physical SIM or an eSIM.
Recent iPhones from the iPhone XR, XS series and later models have dual SIM features, allowing you to use both a physical nano SIM card and an eSIM card simultaneously.
That said, you can insert a SIM card in your iPhone’s nano-SIM slot and use an eSIM.
For starters, an eSIM is a digital version of the physical SIM card. With an eSIM, you can activate a mobile rate plan with an operator without having to use a physical SIM card on your device. All you have to do is download the plan on your phone directly.
With an eSIM you can add a local data plan when traveling abroad, use a separate number for work and another one for personal use like private calls. You can also use a separate voice and data bundle as well as make and receive voice and FaceTime calls. Sending and receiving of iMessages, MMS messages and SMS messages are also supported.
Some iPhones support one physical SIM and one eSIM. Meanwhile, the iPhone 13 models and iPhone SE 3rd generation support two eSIMs.
Depicted below is the standard process of setting up an eSIM cellular plan on an iPhone running on the latest iOS version.
Feel free to refer to this simple walkthrough if ever you need some input on how to add an eSIM cellular plan on your iPhone.
Steps to Add Cellular Plan on iPhone
Before you begin, make sure that you’ve secured all the required cellular plan information if you opt to manually enter the details for your plan. Contact your cellular service provider for further assistance if you need to verify some details about your plan.
Once you’ve got everything set, you may go ahead and proceed with these steps:
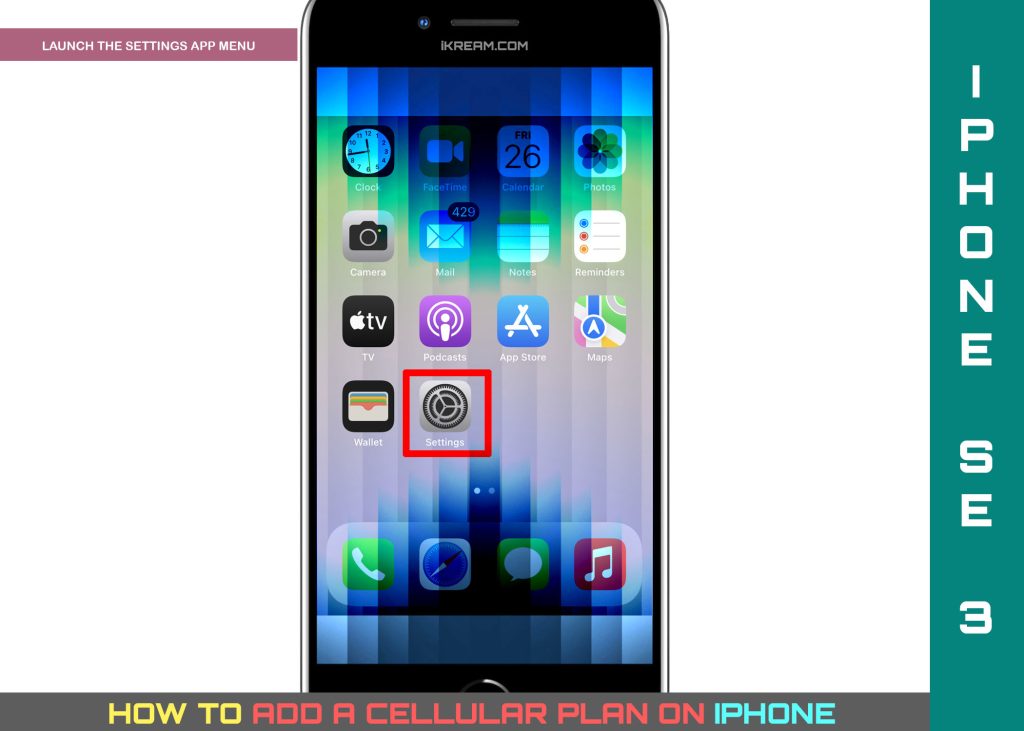
Step 1: To begin, launch the iOS settings app menu by tapping Settings from the Home screen or Apps library.
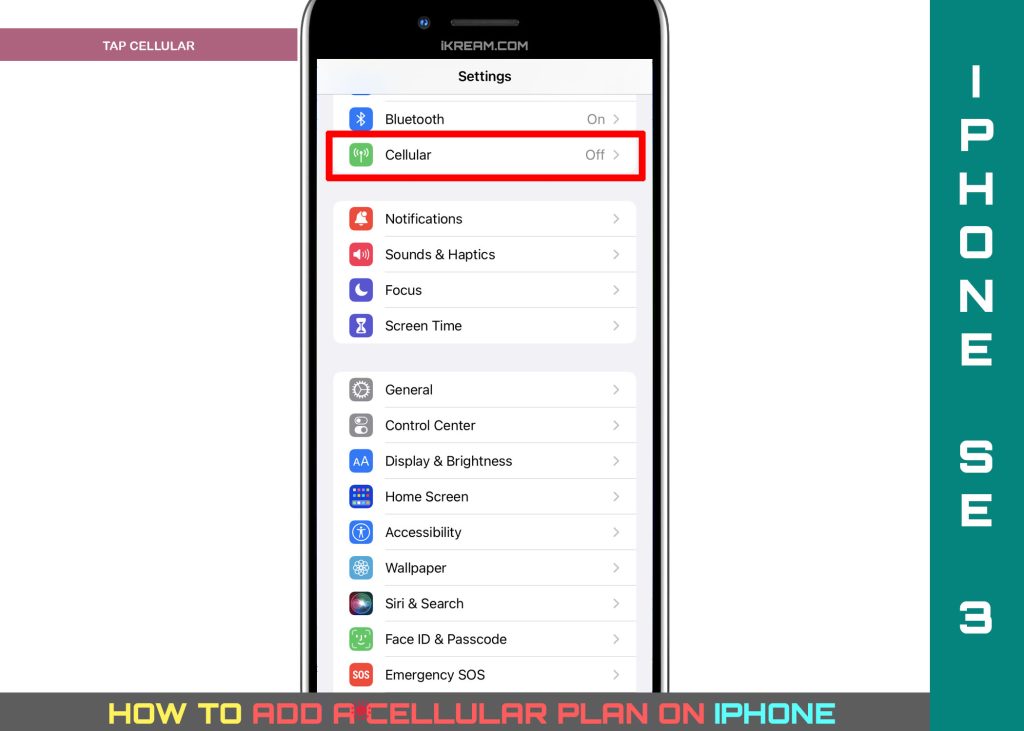
Step 2: In the Settings menu, find then tap Cellular. Another screen will launch with cellular settings and relevant features.
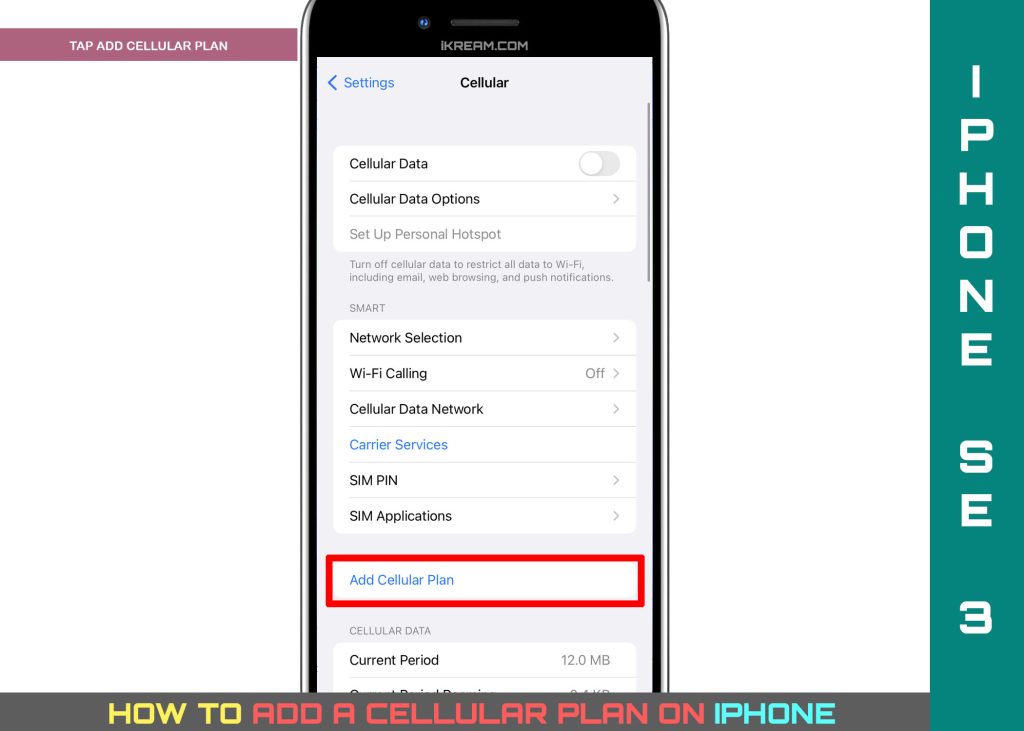
Step 3: Tap Add Cellular Plan to proceed.
Step 4: On the succeeding menu, tap Scan or Enter Code.
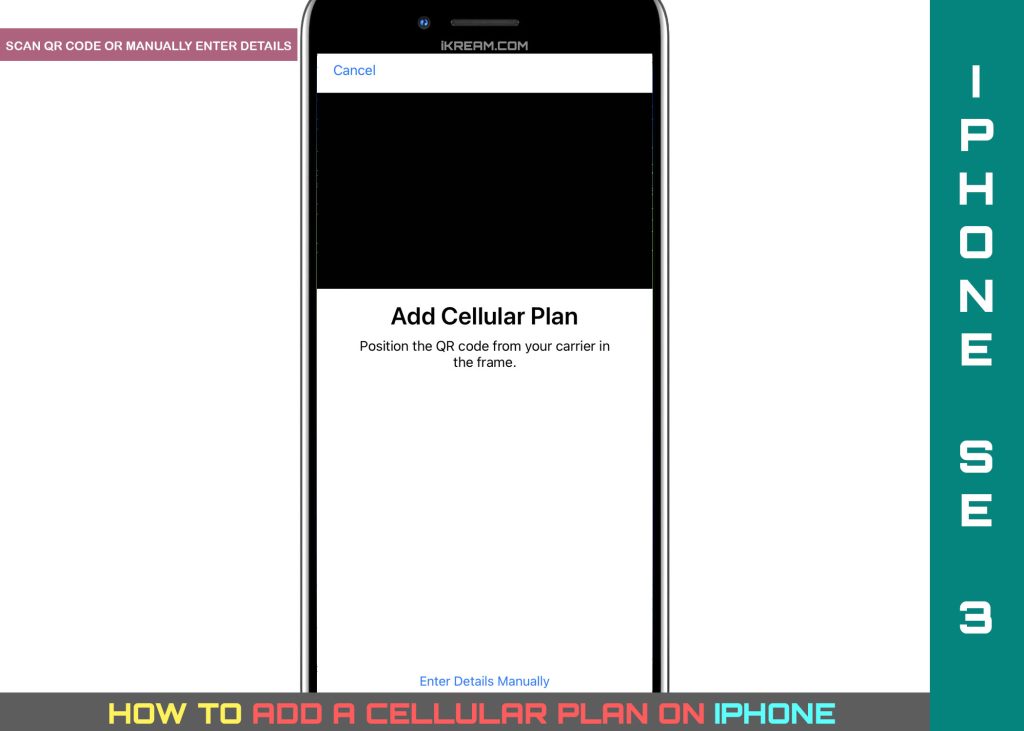
- To scan the QR code, use your iPhone’s camera. The QR code is typically provided by your carrier, if it’s a new plan that you’re trying to set up.
- Just position your iPhone so that the QR code appears within the frame.
- To manually enter the required information, tap Enter Details Manually then follow the onscreen prompts to enter your plan information.
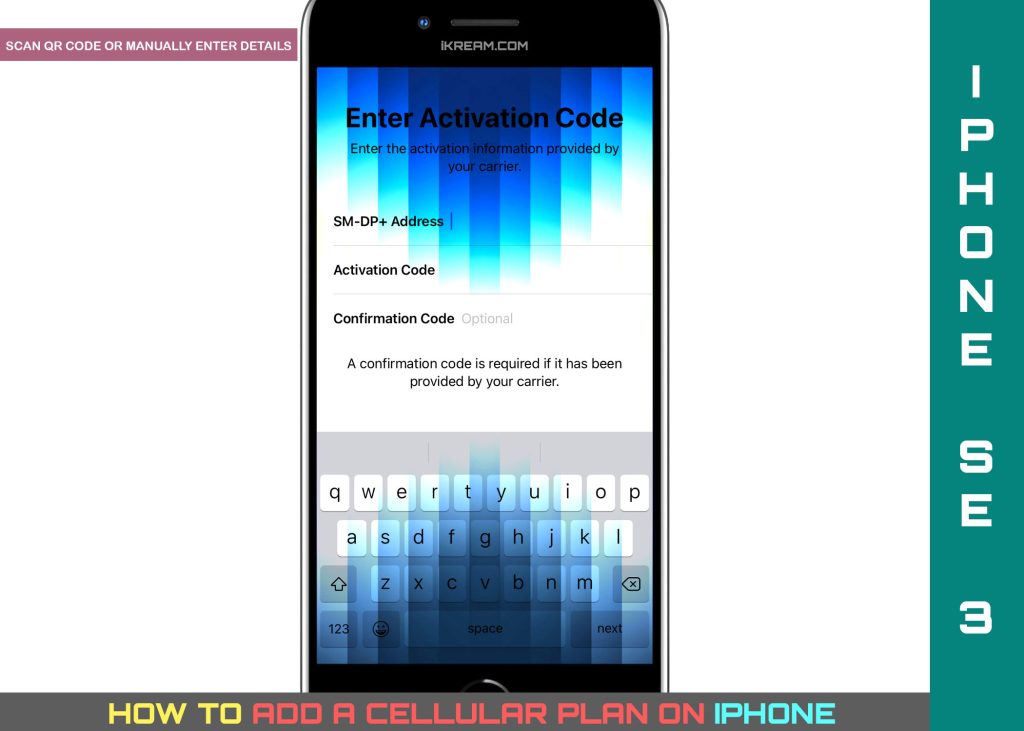
- If a plan was already assigned to you by your carrier, your carrier usually sends a notification saying so. If you see such a notification, simply tap on the option that says Carrier Cellular Plan Ready to be installed.
- If you’re using an old SIM, like transferring a SIM from your previous iPhone to your new iPhone, just find and select your phone number from the list.
If your number isn’t in the list, verify and ensure that you are signed in with the same Apple ID on both your old and new iPhones.
Note that not all carriers or all cellular plans support transfers from a physical SIM card to an eSIM.
Step 5: Once you’re done with the previous step, tap Add Cellular Plan on the following screen to proceed.
Step 6: If prompted, name your Cellular Plan accordingly then tap Continue.
Note:
- Labeling of cellular plans typically requires selection of the desired Phone number and desired label. Alternatively, you can enter a Custom Label for your plan.
Step 7: After labeling your plan, tap Done to save all added information.
Step 8. Choose your Default Line then tap Continue.
Step 9: You may be asked to choose the desired line to be used for iMessage, FaceTime and Apple ID. Just follow the onscreen instructions to make your line selection for Cellular Data then tap Continue.
You may also opt to allow Cellular Data Switching accordingly. Just follow the given instructions to allow or deny cellular data switching.
Step 10: Once you’ve got everything selected, tap Done.
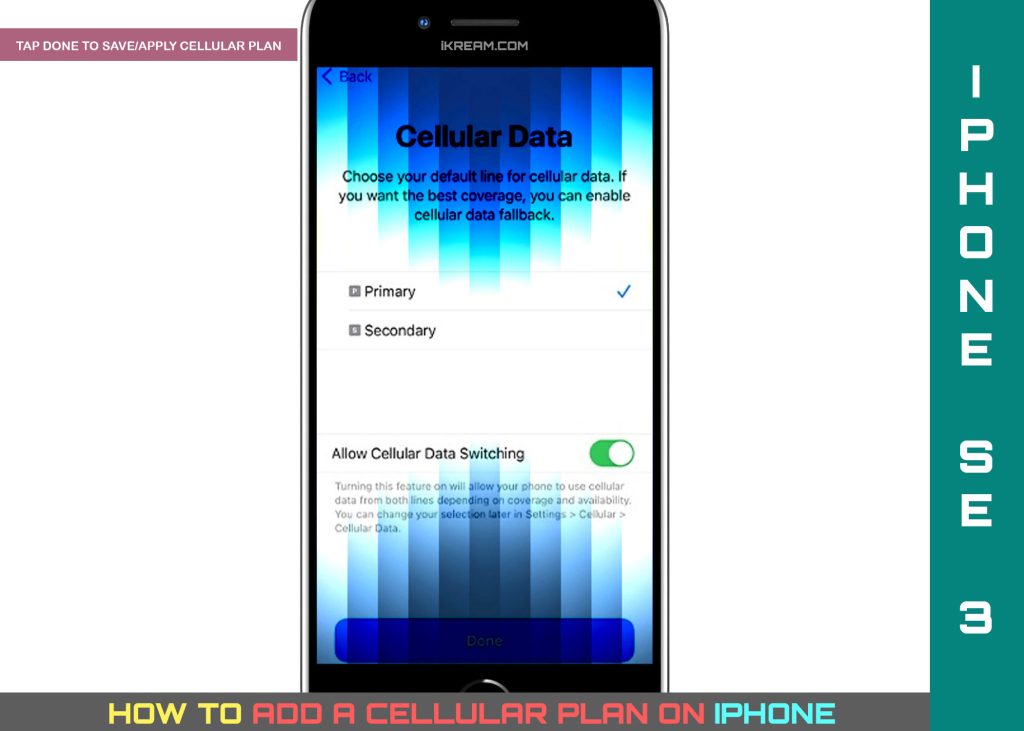
If the new cellular plan you’re trying to set up is already your second line, you will need to set how you’d like your plans to work together.
Activating cellular plans can also be done through your carrier’s app (if available). Just download and install your carrier’s app from the App Store then use it to activate your new cellular plan.
Some carriers allow subscribers to convert a physical SIM to an eSIM on an iPhone.
- If your carrier supports it too, then you can do so by heading to Settings-> Cellular menu then tap to select a cellular plan with a physical SIM card. To continue, tap Convert to eSIM then follow the rest of the onscreen prompts to finish the physical SIM to an eSIM conversion.
Please note though that eSIM is not yet available in all countries or regions.
And that’s how adding a cellular plan is carried out on an iPhone running on the latest iOS version.
Please keep posted for more comprehensive iOS tutorials and troubleshooting guides on this site. Or you can check out this YouTube channel to view more comprehensive tutorial and troubleshooting videos including recent iOS devices.